Our goal is to render an animation
from max utilizing 2 (or more) cameras. Video Post allows us to render such
animations without leaving the max environment, and can greatly increase
workflow.
This
tutorial comes with 2 max files, cam_tut_work.max, the raw file with the
animation and cameras. This is the file to use for the tutorial.
The second
file is cam_tut_done.max which is the project completed, to compare against if
you have any problems. They can both be downloaded
here (compressed zipfile
37k).
FIGURE 1

FIGURE 1
STEP
1
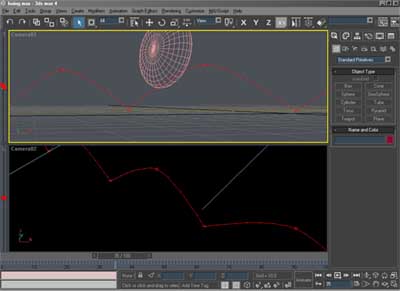
We start out with our initial scene
(cam_tut_work.max) complete with 2 cameras (Figure 1). To
render multiple cameras from within max we need to utilize Video Post.
In
this animation we want frames 0-55 to be camera 1, 56-100 to be camera
2.
FIGURE 2

FIGURE 2
STEP
2
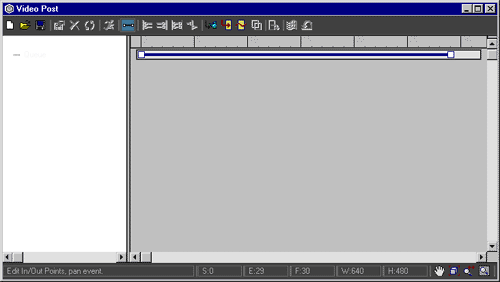
Bring up the Video Post dialog by going
to the top menu Rendering/Video Post. We are presented with the dialog shown in
Figure 2.
FIGURE 2A

FIGURE 2A
STEP
3
Next we must Add a Scene Event. This basically
means we are adding an element from our max scene, be it a camera,viewport, file
or animation. (Figure 2a.)
FIGURE 2B

FIGURE 2B
STEP 4
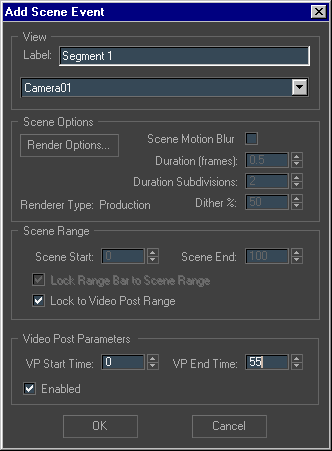
The Add Scene Event Dialog. (Figure 2b) Here we will declare which camera we will use
for the initial segment* of the animation. The top drop down menu provides us
with our available views. Select Camera1. Edit the Video Post Parameters on the
bottom thusly: VP Start Time:0 VP End Time:55 Click OK.
FIGURE 2C

FIGURE 2C
STEP 5
Now we have our event in the queue
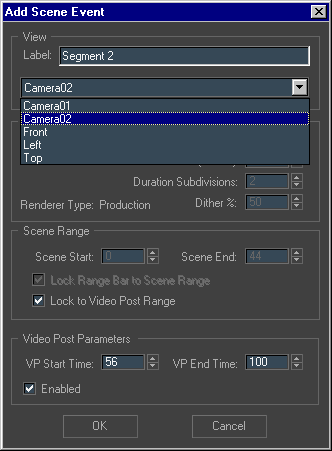
with the sliders representing the active time. We now add camera 2 into the mix.
With nothing selected in the event queue, click on the add scene event button
again. (Figure 2C) Edit the dialog box so the View is
Camera 2, and the VP Start/End time is 56 and 100 respectively. Click OK
FIGURE 3

FIGURE 3
STEP 6
Our Video Post setup is almost
complete. The final step is to Add an Image Output Event; in essence this is
declaring the file/files we are outputting. Without this step, the frames will
be rendered but not saved. Again with nothing selected click Add Image Output
Event.(Figure3) Add a label and click Files. You may
now choose your output filetype as well as compression options for avi/mov
formats. Make sure that the Video Post Parameters ranges from 0 to 100. This is
the range of frames included in the Video Post queue.
Click
OK.
FIGURE 4

FIGURE
4
STEP 7
The final step is to execute the Video Post queue and output the
final render. The icon of the running man is the Execute Video Post Button. When
clicked we are presented with the following dialog. (Figure
4). Here we may choose the range of frames to render as well as output
size and other render options. The other render options (i.e. shadows etc.) are
accessed through the standard render dialog.
NOTES:
This is a basic
introduction to the functionality of Video Post. There are a myriad of other
features that Video Post offers, you may use any number of cameras/views/files,
as well as add filters to your anims
Video Post can also be used to composite
individual frames into a single animation as well.
The settings in Video Post
can be saved for future use, or use in other files. The Video Post settings are
automatically saved along with the max file as
well.
© 2001 This tutorial is copyright by Everflow
Studios and may not be reproduced/distributed in any way/shape/form except for
printing the pdf version for personal use only.
