|
|
| fresh with the lightwave 7.5b update, newtek gave us a new gradient function called 'thickness'. since i prefer to work with gradients instead of plugins i started to play with this function to create nice looking glass. to speed up the things a little bit, i won't use lights, just a hdri as reflection/refraction enviroment. | |
| first step, we need an object. a sphere isn't really a nice object to test such things, we need something with small parts as well as thick parts. i'm a little bit too lazy to model something so i just export a nice mesh from my quaternion program and i will use this one to explain the procedure. you can download the object at the bottom of the page. | 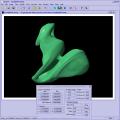
|
| ok, now we have an object to play with it. next step is to prepare a
scene which will give us the ability to see what we are doing. as i
mentioned, i will use a hdri for this reason, this is the best for
reflection/refraction stuff because it is really fast. you can use the
hdri from the sample scene from http://www.realtexture.com/hdri1.html or any other hdri
you have. load the hdri with the image editor and then add the image world
plugin under effects (ctrl+f5). add the hdri to the image world. as a last
step, disable the 'affect diffuse' and 'affect specularity' options from
the light properties panel. for those people who won't use the quaternion, here is the description of things we need. the object contains two layers. the main layer is the object itself and the second layer is the very same object but flipped. this layer isn't really required for the thickness gradient, i will explain it later what's the reason for this layer is. |
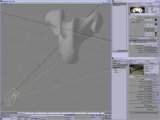 |
| the scene is done, the object is loaded. now we'll start to work on the surface, which is indeed, the main part. to speed up the first renderings, you can disable the second layer. you can use either the scene editor or the object properties to do this. then go to the surface i've called quat_out. this is the outer surface of our object. check the texture box for transparency value. change the layer to gradient and choose thickness as gradient input channel. my object is around 2 m in size so i use a gradient of 2 meters and add the two marks at the top and at the bottom of the gradient. i don't want a completly opaque object so the 2 meter value is 10% and the zero meter value is 95%. go back to surface panel and type in a value for refraction index. i use 1.2, it's not the exact value for glass but this doesn't matter at all, just use what you want. a value below 1.4 will produce nice refractions which aren't to strong to drive our brain into trouble while trying to understand what we see. now go to render options and check the raytrace refraction box and decrease the ray recursion limit to 4. 2 would be enough for the first test as well, so choose this in relation to your hardware. after a first render test you should get an image like this. not really exciting at all but read on. | 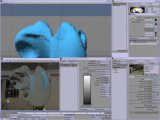 |
| the reason is simply, we have to check double sided for our surface because the surface thickness gradient needs this. to avoid the next disappointment, we'll go straight forward to tune our settings. glass is nothing without reflections. so click on the texture button for the reflection channel (we still working on quat_out). change the texture layer to gradient and select incidence angle as input. glass reflects the light similar to other stuff like plastic or polished surfaces, this means, not linear like metal. so add a marker at 90 degree with a value of 2 or 3. since nothing reflects light 100 percent, everything absorbs a little bit of the incoming rays, we change the value of the marker at 0 degree to 95 percent. now add some additional markers over the whole gradient and give them values of 6, 8, 12, 20 to get a gradient like shown in the image on the right. this is not 100% correct but i explored that this is close to the realworld. the gradient should be more darker over the entire range but this produces strong reflections close to the zero degree incidence angles and this will tend to strange white points in our renderings. if you have a dark enviroment you will see that you get very weak or no reflections on the other areas of the object so i think this is the best compromiss between nice and real. | 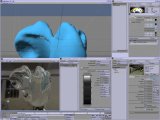 |
| our object turns slowly into a 3d shaped thing, so we are on a good way. next step, we want a kind of color filter like seen with the plugin coffee. unfortunately, we can't use the build in color filter function for this so we'll fake this. copy the gradient from the transparency channel to the color channel. the gradient will look a little bit different now and this is what we want. pic a color for the top marker and a slightly different color for the bottom marker. to gain the effect we want you should use a darker color for the bottom marker and a brighter color for the one on top. what we are doing here? we link the thickness of the object to it color. if you check some glass around you you'll see that the color is more impressive where the glass is thicker and that there is no visible color on thin parts. normally, we should get such result with the usage of the transparency channel only but the method i descripted gives us more control over this behavior. you should play with the gradients a little bit to get familar with the meaning of the parameters and to get the result you want. after some attempts you should get a picture like this. | 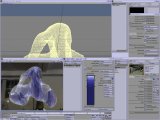 |
| the object looks like some kind of plastic or the nice fluid animals swimming in the oceans with those thin tentacles on the under side. one of the reason for this is the wrong total inner reflection. since we're using douple sided polygons we have the very same surface on the inside like on the outside. this isn't what we want. so let's enable our second layer and then we switch to the second surface. set the transparency to 100% and then click on the texture button for the reflection channel. create a gradient with the input channel incidence angle and 4 markers. one on top with 100 percent, one near the middle, also with 100 percent, another one close to the second, with 0% and a last one on the bottom, 0% as well. replacing the 0 with 2 it would be a normal total inner reflection gradient. we're using 0 here because we have some reflection because of the douple sided surface. this won't be 100% correct but it isn't really an important difference. we have now a little bit too much reflection between 10 and 45 degree incidence angle. with some tweaking of the gradients you can change the look and feel of the reflections. | 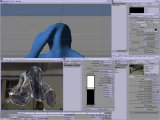 |
| last part. it still looks a little bit dead. what we need is stronger colors. simple reason, we're not using the color filter at this moment and so the light going through the glass is not affected by the color of the glass. so let's check this option (advanced surface parameters). if you want strong colors you have to use a high value here and twice versa. now we can tweak the appearance of the colors with the gradient we added to the color channel earlier. | 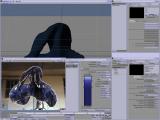 |
| we used a hdri for our experiments without the usage of radiosity. this is the reason why the diffuse value doesn't play any role here. if you going to use this object in other enviroments with normal lights or with hdri and radiosity you have to change some values. first, to see lights you have to use specularity. change the glossiness based on the surface. this means, use high glossiness for polished surfaces and low glossiness for matte surfaces. now you have to tweak the diffuse value. glass tends to a very low diffuse value because it is transparent and it just absorbs the light going through the glass. if you want stronger colors of the glass (or plastic or fluid, whatsoever) just move the gradient marker for the transparency value upward to get less transparency on thiner parts of the material. usually you'll get into one problem when using lights and envo's with just one color (backdrop or so), the inner reflections of the enviroment is too strong, so feel free to tweak this as you like. maybe you should remove the backdrop reflection from the inner surface and use raytrace and a spherical reflection map instead. | 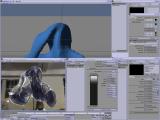 |
| so why should we run up the hill if we could use some plugins for this
as well? first, i really like to use shaders like coffee for the
simulation of transparent materials but sometimes i want more control over
the stuff i do. lightwaves gradients and especially the gradients
'incidence angle' and 'surface thickness' provides optimal control over
the surface parameters. next reason, speed and money. popular plugins are
often not for free and as i know from my own experience, you don't need
the full range of possibilities of a commercial plugin or you just need it
for only one production and the plugin will blow the budget. the speed,
especially older plugins doesn't take advance of multi cpu systems or you
run into troubles if you force the system to render on more than one cpu.
it's not that i like to fake things (the thickness gradient isn't a fake
at all) but if you have the deadline close behind you and the fake looks
similar and is faster, why should we not use it? and last but not least,
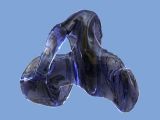
to know how things are working is not bad at all :-) here is a last rendering. |
|
| finaly, here the download of the object and the complete scene. this
requires lightwave 7.5b. you can grab the update for free at the newtek
page if you need it. lightwave scene lightwave object hdri used for this tutorial, taken from realtexture hdri vol.1 hdri collections at realtexture.com if you encounter any problems while trying to download the stuff, try to use the secondary mousebutton (mostly the right one for right hand users, so not for me) and then choose 'save target' or however it is called for your preferred browser. thanks for reading, and as usual, comments and suggestions are welcome. just send your comments to tut@dbki.de. please be patient if i don't answer within minutes, i'm very busy by default. if you want special hints and tips, please describe your problem more detailed than just 'i want to render a whole city, how should i start?'. and if i don't answer, do not hesitate to email me again ;-) |