|
|
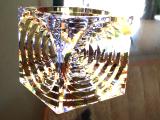
| inspired by the prism tutorial from lw-fin.org i was thinking about how to achieve such an effect with hdri. since i wasn't keen on the lighting, just the refraction part was interesting for me, i started to do some tests. and it was a little surprise that i found different ways to use a hdr image and that my technique works well for 'common' lighting setups as well. touching this interesting phenomenon caused a nearly complete research about color/light theory and conversions between different color models. |  |
| the main technique is very similar to the caustic stuff. we render different parts of light with different refractions. but how to break a hdri image into his light compounds? i found two solutions for this problem. first one works for complete scenes and for all objects and the second one is handy for single objects. as a third part i will describe how to use lights to gain similar effects. but let's start with the first one. i will describe the first part a little bit detailled, if you get bored just skip some lines ;-) | |
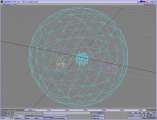
| to filter the hdri/background i've created a sphere around my object
with an own surface called sphere. size isn't really important, the sphere
should be larger than the other objects and a tesselation ball with level
4 is enough. transparency is set to 100%, no refraction index (means 1)
and color filter to 100%. activate douple sided or flip the sphere, since
we will work inside the sphere we have to keep sure that we can see the
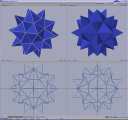
surface. next step is to setup the object which will produce our chromatic abberations. i've created an icosidodecahedron because i think this looks funny and it is similar to a prism but more interesting. after creating poles with ikedas plugin and scaling them out i got a nice spiky thingy. i added a surface for the outer side, copied the object to another layer, added the surface for the inner side and flipped the object. you can do this with every model, it's not important to use exactly the one i've described. |
  |
| back to layout. setting up the surfaces is a standard task but with
some minor changes (refer to my glass tutorial if you need more
informations). here the main parameters. outer surface: diffuse/luminosity = 0, spec = off (not required for hdri environments), reflection = non linear gradient, transparency = 80-90, refraction index = yes ;-) the refraction index, since we want different refraction at different renderings we have to use an envelope for this. i've created an envelope starting with 1.51 and ending with 1.53. this doesn't sound spectacular but some researches on the internet have provided this information for standard glass. it is important to set up the refraction evelope regarding to our color envelope we're going to add to our sphere. the bluish range is more bended than the reddish one. just keep this part in mind, if you encounter to harsh color separation, decrease the range of the refraction index. |
 |
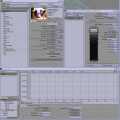
| now we have to modify the sphere surface. for this we will need an envelope. unfortunately, the setup of the envelope isn't like eating icecream. i tried to use a gradient but first, we can't use any time function as an input and second, the attempt to use 'distance to object' failed because it isn't affected by motion blur. (the movement of the object is proceeded but not the affect on the gradient!?!?) easiest thing is to download the envelope (means the surface) from the bottom of the page. otherwise, refer to your color gradient (if you use the lightwave color selector), there is a wavelength gradient which shows you the rgb values for each wavelength (click on it). i don't want that you run into a letdown and so i tell you that this won't work perfectly. why? first main problem is, there is no correct wavelength to rgb conversion, and lightwave uses rgb. next, we will get a reddish, browny glass. and it will be too dark. this is mainly based on the fact that our gradient is not well balanced in the way that all rgb channels having the same average. to get a white, means colorless, glass we need well balanced channels badly. so i went on to tweak the envelopes a little. i cutted the first part from the spectrum and stopped a little bit earlier. then i went to use the results i got after a wavelength to rgb conversion without cutting the values at 100% (255). now i got a satisfactorily result. without going to deep into this color range problems, the rgb spectrum covers only a part of the visible spectrum. if you want to gain further informations about converting spectrum to rgb feel free to visit: wavelength to srgb conversion |  |
| now we have to set up the camera for our actions we want to perform. that's quite simple, we're using the effect that lightwave will render backward in time while calculating images with motion blur. so our sphere will filter all colors but the one from the envelope for this certain moment in time and so we have only the light information for this one part of the spectrum. select motion blur, blur length is 100%, this isn't really cool for real motion blur but we have spreaded the spectrum from frame 0 to frame 1 so we need 100%. antialiasing settings are up to you, the more the better. now jump to rendering settings, switch on raytrace refraction and raytrace reflection, ray recursion limit 4 (for the beginning), image viewer or save options, as you prefer. just pass to the sphere object properties and select at the alpha option 'not affected by object' if you want to get an alpha channel. |  |
| last step befor we can hit f9 (f10) is to load a hdr image. open image editor using ctrl+f4 and load a hdri. ctrl+f5 let's pop up the backdrop settings. add the image world plugin to the list below and select the hdri image as image world image. depending on the hdri you have to adjust the brightness to match a normal environment without loosing the highlights. now go on and make a first test. if everything works well you should get an image which looks like glass and depending on your environment you may see some rainbow coloured refractions somewhere. as i said, the quality of those rainbow effects are based on the antialiasing settings. the color of your glass depends a little bit of the shape of your object. i got different results with different objects. maybe this is an internal effect of the lightwave render engine or just the imperfection of the technique. |  |
| now let's talk about the second method. the advantage of the first method is, it doesn't matter how many objects you want to render, you just have to set up the refraction envelope for each object. the second method gets rid of the sphere. as you maybe imagine, we'll use the same color envelopes for the object itself. this is a little bit the bad side of the method. adjusting the color for the object is more a try and error game. tweaking the envelope creates different colors. the profit of this workflow is that you just manipulate the object which is made out of glass or so. if you have other objects in your scene, with reflection for example, you have no color filtering between those objects and the background. even if the reflection is not affected by wavelength it may cause colorfull borders during the progress of antialiasing because of the different view angles. if your object is surrounded by other objects, you will see them with the same abberations (the objects themself are not affected by this technique but the refraction showing those objects). | 
|
| using the envelope to modify the object color brings back the ability to render caustics as well. this hardly depends on the shape of the object and requires a real light in your scene. but to make the light source visible we have to use specularity. unfortunately, this won't work if we look through the object, targeting the light source. for this scenario we have to use an object (like a ball or so) with bright luminosity. even if this method sounds more logical, i discovered some problems. first, if the object is kinda complex and/or includes other objects (like water in a glass) the objects get a heavy color tint. this is recognizable at the first antialiasing step and doesn't change until the last. if you encounter such a problem, switch back to the sphere technique. next problem, multiple refraction/reflection. if you can look through your object or your object is reflected by other object, it may happen that you get coloured dots at some surfaces. this is because of the antialiasing, which works only for the current color of the envelope. if you spread the refraction too wide (1.50-1.55 for example) you won't get any antialiasing for the rainbow parts. next problem, mostly appearing with hdri, if you have bright spots, every channel (rgb) is so bright that the color filter can't filter (it does, but the result is still a bright value which is shown as white). i don't know if this is a correct behavior but you'll have white parts in each (motion blur) step. this shouldn't be like that but it is. in this case, the color seperation don't work proberly. the 'rainbow-effect' will become very subtle. |  |
| here are the necessary surfaces and envelopes. surface outside: outside surface (srf) surface inside: inside surface (srf) envelope: envelopes (red, green, blue) |
|
| related links: http://www.dbki.de/index.html tutorial index at dbki http://www.realtexture.com/ suggestions, questions, recommendations, corrections are welcome - email |
|