|
|
| here some tips how to get nice pictures with hdri lighting and how to get them in a usefull time ;-) | |
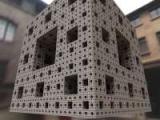
| part one: if you just want to render a single object like a statue or something like this (non complex things, compact stuff like cubes and so on) and you don't need this nifty radiosity effects on the floor (colored bounces ...) you don't have to use monte carlo or similar complex radiosity algorithm. you can use for example lightwave's backdrop radiosity. this will light your object without any bounce and so it is really fast compared to monte carlo. and since the radiosity of the enviroment is kind of 'baked into the hdri' it will look really nice too. |
 |
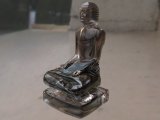
| part two: if you want the reflections of the hdri on your object but there is no reflection of the object on surfaces around the objects you can switch off raytraced reflections. set as reflection options for your surface 'backdrop only' and turn off raytraced reflections. this will speed up radiosity renderings a lot (2-4 times faster, depeding on scene and objects) but keep in mind that every surface will reflect the background because the reflection of another surface on this surface is not calculated. this means you can see the reflection of the background on parts on your object which are behind other parts. check the picture, the light source is on the left side, so the inner rim has to be dark. |
 |
| part three: same for refraction. if you don't see any objects through other objects turn off raytraced refraction and change the surface refraction to background only. |
 |
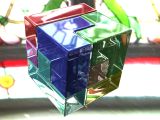
| part four: hdri lighting is nice, that's for sure but not really necessary in any situation. if you using a hdri with only one big light source (like a room with a window or so) try to use an area light and use the hdri for reflection/refraction only. the result is very similar, sometimes better and you don't get in trouble with your deadline. i used 2 area lights, raytraced refractions and reflections (ray recursion 8), inner surface with total inner reflection and the hdri only for reflections/refractions. this picture will take days if you try to render this with true radiosity. |
 |
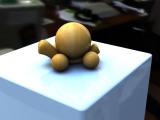
| part five: a little trick i use for photos too. over exposure the renderings. especially for reflections is it very usefull to make them a little bit brighter than usually. you will see, this will increase the realism of your renderings because it's often seen on photos (exposure is measured for the main object so tables, reflections, windows are over exposured) and so you can switch to lower radiosity settings. |
 |
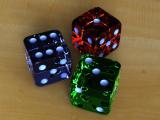
| part six: that shity noise - depending on your scene, it could be usefull to use lower radiosity settings and more antialiasing passes. i'm a big fan of the true antialiasing passes of lightwave called enhanced ... and my experience is that you are sometimes faster with lower radiosity and better antialiasing than inversely. especially when you use reflections/refractions and small size of renderings (animations, web content) |
 |
| part seven: compress the dynamic of the hdri. there is a nice plugin for lightwave, called hdrexposure. you can 'level' the hdri with this one but keep in mind, the advantage of hdri is the dynamic, so if you compress it you will lose hdri features (strong reflections, direction of shadows). if you compress a hdri to the same dynamic like a ldri (normal texture stored as jpg, tga, tif, bmp or whatsoever) you will have a ldri. click here for a comparison. hdri exposure |
 |
| all examples are rendered with hdris taken from hdri
vol.1 thank you for reading this tutorial and if you have any comments, suggestions or questions feel free to email me at tut@dbki.de |
 |
| related links: compositing and hdri hdri lighting hdri and backgrounds http://www.dbki.de/index.html tutorial index at dbki |