|
|
| one of the most important feature for photorealistical renderings is
'imperfection'. this means, humans are thinking always in dimension which
are defined by things surounding them. we see photos, videos and magazines
each day and so we have a feeling for what is real and what not. if you
look and renderings on galleries or advertising you'll often see that this
isn't real. i wrote about some things like noise in another tutorial
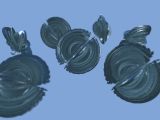
(compositing) and so we will discuss another technique now. even if the problem with sharpness (or unsharpness) is based on imperfection of the technology for shooting pictures, it is a main part of product visualization and advertising. if you want to give the final touch to your product renderings you have to take 'depth of field' into a serious consideration. since lightwave comes with a 'not bad' depth of field effect but most of the people using it doesn't have any technical background of classical photograph the parameters for this effect are kinda strange to understand. this tutorial will cover how to set up a handy scene to manage the 'depth of field' effect with lightwave. |
 |
| fortunately, lightwave comes with very comfortable tools for managing the 'dof' effect, so we don't need any external script or tool. the tutorial is splitted into two parts, the main setup and the advanced setup. for the first part you don't need any knowledge about expression and channel handling but the second part will add some more features to our controls and for this part you need to know how to add a channel controller and master channel. | |
| as a very first step we'll need some objects for our scene. just add some objects of your choice, 4 or 5 are enough but try to keep the polycount low, it will save a lot of time if we do some renders for test purposes. now go and set some different positions for those objects, for a first test it would be good to keep them on the same y-position. this step includes the placement of the camera as well, everything should be arranged the way we can see most of our objects and so that some of the objects are close to the camera and some far away. the distance between the objects has to be choosen by their dimensions, just as a hint, it would be nice to have space between our objects like 4-6 times the dimension of the object (physical measurement, not 3 or 4 or 5 dimensions ;-) ) after performing those steps you should get some similar picture like shown on the right. | 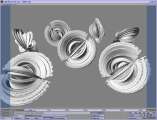 |
| switch to top view and zoom until you'll see all of our objects and the camera. then switch to the camera properties, select the stereo and dof register. as we can see, the field for 'depth of field' is gray (or partly hidden or whatsoever) because we have to use a higher antialiasing setting than low. medium is enough for the beginning but we will go to higher values later to gain more quality. so just select medium and switch on 'depth of field'. the standard values are pretty useless so just guess the distance to the middle of your object swarm, this doesn't have to be exact at all and left the f-stop value as it is. if you still have the top view of your scene you should see a circle around your camera. this circle shows us the focus distance and if you have guessed the distance correct it should be around the middle of the group of objects. | 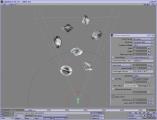 |
| now we go to add a null object to our scene. call it 'dof', it's not important, just to have a handle for this object. parent this object to the camera (m for motion options or ctrl+f1 for scene editor). now go to object properties and add a custom object called 'depth of field display' to this object. just keep the default options for this custom object. now you should see an additional yellow funnel (shaped like a box tho, not round) at the very same place like the one which is showing you the view angle of your camera. unfortunately, there is a bug. the funnel is very short and not because of our small range of sharpness, no, our range is too high, called hyperfocal, and so this funnel isn't drawed correct. (depending on your scene, this could look different) | 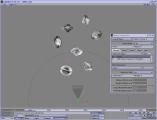 |
| now go back to the camera properties and change the f-stop value to 1 for example, this depends on you scene but should work for a test. the shape of the funnel should be cutted at the beginning and the end, representing the range within the objects will appear sharp. this area is calculated based on a value called 'circle of confusion' which means the size of a point that is recognized as a single point. as smaller this value is as smaller the area will be in which objects are defined as 'sharp'. sounds kinda confusing and simple means, if you sense an unsharpen picture as sharp, you will have a large 'circle of confusion' and if you think a sharp picture is unsharp you will have a very small 'circle of confusion' (this isn't really based on your eyes, more a term of definition). this is an subjective value, but 0.025 mm is used as a standard for real photography. since we don't deal with mm or inches at the moment, this value becomes very subjective and we're going to ignore it for a moment. deselect the camera by selecting the 'dof' object and you will have a similar picture like mine. | 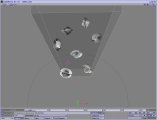 |
| now we have a scene with a nearly complete 'dof' setup. changing the f-stop value will change the shape of our 'depth of field'-object. just play with the values to get a feeling for it. you will notice that the part behind the focus point will increase/decrease more than the part in front of it. this is physically correct, if you don't like it - just move the focus point so that your preferred objects are in focus. since lightwave 7.5 (not sure if b or c is required) you have a 'depth of field'-preview. switch to camera view and press shift+f9. after a few seconds (depends on polycount, graphicboard and cpu) you will see how your rendering will look like. as you surely have recognized, the 'depth of field'-object is only usefull in other views than camera view. | 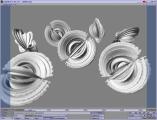 |
| if you found a camera setup which fulfill your needs then start a testrender. if you haven't used heavy models or radiosity or so the rendering should take only some moments. if you don't use raytrace or refraction, you can disable 'extra raytrace optimization'. this will speed up rendering, especially for high poly models. | 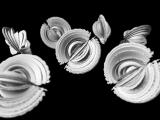 |
| after finishing this first part we got a basic 'depth of field' setup and we understand the important parameters. now we going to add more comfort to our scene and we will discuss some additional parameters. this part will include the usage of master channel and sliders to control the focus distance and the focus range (f-stop). if you not familar with this and you don't understand the following description, please refer your manual for indepth explanation of the used function. | |
| we're going to use the same scene. go to your generic plugin menu and
select master plugins. if you're using non standard lightwave config, then
go and search for it ;-). now we go to add some master channels. we will
need 3 of them, here is the list: distance - type: distance focus range - type: distance zoom - type: number |
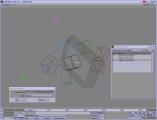 |
| now we have to link these master channels to sliders and, of course, to the related values. so just jump over to the camera properties, click the envelope button beside the value box and go to the modifier register. add a channel follower to the list (should be empty befor adding the modifier), douple click on the modifier and search for the related value under the master channel section (MC), means zoom for camera zoom and distance for focal distance and last but not least the focus range to the f-stop value. focus range isn't really correct, i just used this name because it is more familar to people which aren't working with a camera each day. did i mention that you can leave all the other values at the channel master list as they are? now i did. but what i really forgot is to tell you that you have to set the curent value to zero, for each parameter for which we added the channel follower. otherwise the slider is just acting like an offset to this value. | 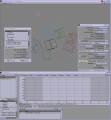 |
| next step, and we are close to finish our job, select the null object called 'dof', go to object properties and add another custom object called sliders to the custom object list. douple click on it to open the properties. search at the left side for our master channels and add them to the right list. now modify the default settings for those channels a little bit. distance should be between 0 and 100 (depends on your scene and means in our case that we use meters), focus range should be changeable between 0 and 5, but you can also use 0.001 or so because 0 isn't really usefull. and the latest parameter should be adjustable between 0 and 10, if you need more zoom, feel free to change this value later or now. | 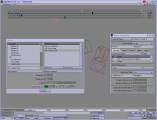 |
| as a very last step i've added another null object, parented to the camera, and this null object hosts a custom object called 'item shape'. i've selected a disc as item shape and the size was left as 1m and the axis for the disc is y. you can use a ball as well, how you like. unfortunately, we can't change the size of an item shape per envelope but this isn't really a problem. just go to the graph editor again and add a channel follower (as described above) to the x and z scale (if you use a item shape ball then add the follower to the y axis as well). now we have a nice circle around our camera, showing us the focal distance. this is the same like the circle shown in planar viewports but now we have it in every viewport (ok, it's kinda useless in camera view but you can see if the circle line is hidden by your objects and so you can guess if it's behind or in front) | 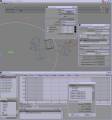 |
| that's all. i think it's kinda easy but for all who didn't understand
what i tried to explain, here is the scene for download. you can use this
scene as a start project, just throw in your objects and you are done. demo
scene now some advances and disadvances. one major argue for using lightwaves 'dof' - it doesn't cost extra money, the next thing, you can use every feature of lightwave (except some post processing plugins) and it is always proceeded while rendering with antialiasing (no additional steps required, very usefull for animation, can save a lot of rendertime). next big advance, you can render segments which isn't possible with plugins like x-dof or x-dof2. this is very usefull for high resolution renderings. last but not least, i like the integration like shown above, you have open gl preview of the dof effect and you can easily change all the settings via slider. nothing without a teardrop. if you going to use extreme dof effects you will recognize some kind of jitter-bugs or multiple pictures. lightwaves dof doesn't perform a blurring like x-dof or real photo cameras. so you just can increase the antialiasing steps. there is also an image filter called 'depth of field blur' which performs a blur of the objects which aren't in focus. just add it at the post processing panel. another hint for this is to use stereoscopic rendering with a small eye separation value and then combine this pictures with image viewer or your prefered image manipulation software. this adds an additional depth effect to the picture because it is comparable to the way we see the 3d world. another trick, but that's really a hack, is to move or rotate the objects which are really out of focus a little bit, so motion blur will smudge them. very usefull for low antialiasing settings (medium is minimum tho) |
  |
| related links: http://www.dbki.de/index.html tutorial index at dbki http://www.realtexture.com/ suggestions, questions, recommendations, corrections are welcome - email |