| part2b: texturing/rendering 2 |
now we want to discuss some problems. first problem
is lighting and shadows. our landscape doesn't look bad and it's smooth,
the texturing isn't bad as well. now we need some lights. for such a big
landscape we don't have to think about radiosity. it will take ages and if
we want to render warps or aninations it will blow up the rendertime.
since the daylight is very diffuse, especially in a valley, we have a huge
amount of diffuse and a spot coming from the sun for the shadows. if you
take a look on pictures with sunlight you'll see that the shadow is mostly
strong and sharp but not completely black (ok, depends on the exposure
settings for the camera). i'm a big fan of hdri lighting and softshadow so
i have allways problems with strong shadows but in this case there is no
other solution. the sun is compared to the ambient light too strong. the
next advantage for sharp shadows is a technical one. try to imagine a
shadow map for our landscape. if we use an area of 100x100 meters (300x300
fts) and you want to place some things onto this landscape and you will
see a shadow of, for example, a tree, which doesn't comes with a diameter
of 1 meter (it's a desert not an old irish wood) you'll need a shadow map
which can see things smaller than 1 meter. for our example, if you use a
shadow map of 1000x1000 pixel, the smallest thing that will cast a shadow
is around 10 cm. but this isn't a smooth shadow, it's a blocky and ugly
blur in our landscape. let's think about the memory we need for the shadow
map. for lightwave for example we need 4 times the square of our value for
the shadow map (1000x1000x4, around 4 megabyte) this doesn't sound too
much but we need a more than 10 times better shadow map for nice
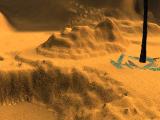
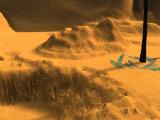
renderings. compare the shadows of the palm and you see we better don't
use a shadow maps.
first image: shadow map size 1000 pixel, second
image: shadow map size 10000 pixel |
  |
| next problem you'll discover when using a spot
light is this ugly areas in the dark parts of the rendering. this problem
is based on the way how a raytracing programm calculates the shadows.
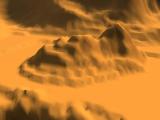
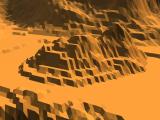
compare the two pictures on the right. first one, our landscape without
any textures but with surface smoothing. next one, the same but without
surface smoothing. smoothing is just an option to produce surface with a
'smooth look' not to produce smooth geometry. it's something like a fake
and this fake is our problem. if the renderer raytraces the shadow (shadow
map is the same but precalculated) it uses the geometry. this means, the
light is blocked by a hard corner or not. there is nothing between. but we
don't see the hard corner nor the flat polygon. and this is the reason for
such effects. why we can't see those effects in the picture to the right?
yes, sorry, i used an other light ;-) |
 |
| i used for the examples an area light. this kind of
light is like a plane (you know those big screen like lights from filmsets
or photo shootings). this kind of light provides directional light with
the characteristica of a dome like lighting. this means you don't have
only a beam with a hard shadow and light rays which always increase the
radius as much as the distance to the light source increase. and you don't
have a distant light with parallel rays which is more natural for a sun
light but doesn't give us the capability of soft shadows. what does an
area light do? it will light our object with different angles. and this is
what we need for soft shadows and for this ugly polygon bugs. and, it
doesn't take longer than spinning light tricks which won't work really
good for big ares with many objects. don't be afraid, you can easily
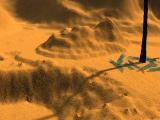
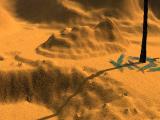
change the look of the shadows with the size of the area light. compare
the pictures. the first one uses a bigger area light than the second one.
you will have the same amount of light but you can adjust the look of your
shadows. you don't need a huge shadow map and it will work for any size of
objects on your landscape. |
  |
as you surely have noticed i added some bump maps
to our landscape. this will help to avoid rendering errors based on the
different geometry resolutions and, there is no landscape that is as flat
as a table ;-). i used a mixture of crumple and noise. you can combine our
formerly used textures like the paths or the rocks for the walls with some
procedual textures.
but back to lighting. we can't lit the whole scene
with only one light (except the case we'll use radiosity). to simulate
radiosity effects we going to use 5 additional lights. i've placed the
lights one on each corner, means north, east, west, south and one above
the terrain. you can use spots without shadows or point lights for those
'skylights' now you can adjust the ambient brightness and color. depending
on the sky you are using you can add different colors for each light.
bluish for the part of the sky without the sun and clouds and more white
or red for parts with clouds or near the sun. check the picture, you can
see the 5 lights and the rays of the sun.
if this all is not good
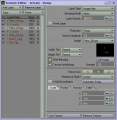
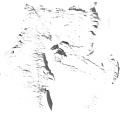
enough there is a last solution. you have to bake the shadows or better
the lighting for the landscape. the easiest way is to place the cam above
the terrain using a large distance and to render the luminosity channel
(for example buffer saver for lightwave) then open it with your favourite
pixel programm and add some blur to it. depending on the size it will
produce smoother transitions for dark/bright areas. other solution is to
use vertice baking or uv map baking but this hardly depends on the mesh
resolution of the landscape and requires more steps. add this map to the
luminosity channel of your surface and disable self shadowing. so you
still get shadows of other objects but the terrain itself doesn't receive
it's on shadow. this can improve renderspeed too. |
  |
so, the lighting is nearly done. depending on the
task you have to do you'll need some additional lights for some places.
you know this movie light setups for characters and places, additional to
the real world lighting it will light up some parts of a scene, especially
in darker places.
to increase the feeling for the wideness of the
landscape we will use some tricks. first one, use depth of field.
depending on the software you use it is a plugin or you will find the
settings under camera settings. unfortunately, it will increase rendertime
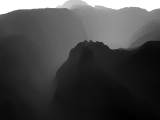
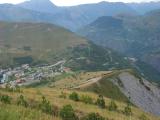
and/or require more memory. if you want some kind of cheap depth of field
you can use simple fog to blur and desaturate the parts which are far
away. we used this for our landscape. check your references and you will
see that those things far away from you are changing the color (blue/grey
on a foggy day near seas or water, yellow/red for areas with sand,
white/grey in the mountains ..)
you can add a distance blur also with
post production. save the z-buffer of the renderings and use this for the
input of the blur filter. (after fx, photoshop) |
 |
| last hints for texture/render. if you work on a
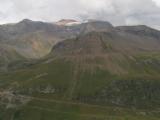
terrain with huge dimension in high, means mountains and such things you
have to pay attention to the vegetation. our example was for a desert,
with less vegetation. but mountains are starting green at the bottom,
grass and trees, going into darker tones for small trees and moss and
finally goes over to grey with only small places of green. so you have to
add additional texture layers with an alpha channel for the altitude.
(remember, distance to object as input channel) don't forget the snow for
very large mounts and add stronger bumpmaps to the peaks to simulate the
heavy erosion effects. |
|
| part 2c: adding some additional stuff to
the landscape - in progress |