|
|
| ok, some basic stuff ;-) a simple gamepad, modeling using subpatch. i used this gamepad for my 'proper hdri lighting' tutorial so it's kinda simple and lacks some details, compared to the original. | |
| we will use some primitives for that operation and so we start with a disc. it's not really important how many sides we have but around 16 is good for creating the big buttons. select disc tool and use the numeric field to enter 16 sides, 3-4 cm diameter and a high of around 1 cm (y axis). place the disc around 3 cm left from the center (or right if you want). switch to polygon mode and select the top disc and the 6 polygons facing to the center. delete those polygons and you should have an object like shown in pic1. | 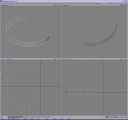 |
| just mirror this part to the other side and connect the opposing parts with selecting the points and 'making polygon' (key p). select all points on top in clockwise direction and create a new polygon. mirror this polygon to the bottom or just create a new one in the same manner. select both polygons and hit key b for bevel. bevel the polies around -3.5 mm inset and 4.5 mm shift. hit the secondary mouse button and bevel again around -4 mm inset and 1.5 mm shift. deselect the top poly and bevel again the poly on the bottom, just an inset of -5 mm, it doesnt matter. delete this polygon and select all the points of the former polygon and use average weld to weld them in the middle. you should have an object like the one shown in pic2. | 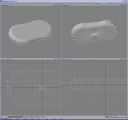 |
| go to a new layer and create a new disc, use the same value for sides and place the disc that way that the border matches the inner shape of the last polygon we've created. the disc tool should have keept the last values so the new disc is at the same place. we just need a flat disc so the high doesn't matter. delete all polygons except the one on top. move this polygon to the same high as the top polygon of the body. now bevel this poly around -2.5 mm inside and no shift. hit the secondary mouse button to bevel again (ergh, works only if you have selected this polygon befor, otherwise you will get a kind of hedgehog ;-)). bevel the disc around -0.2 mm shift and no inset, then -0.2 mm inset and no shift. copy this to another layer, we'll need it later. go back and start to bevel the disc 4 times like a flat ball. | 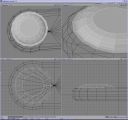 |
| we're continue our bevel session, now we go inside the controller. use the same disc and bevel this disc around -0.2 mm shift and no inset, after that bevel the disc around 4 times and follow the outline shape we've created befor. just bevel one times more to go a step deeper. now bevel this disc some millimeters inset and no shift, delete the disc and average weld the points. small hint for selecting the points. there are some plugins for such stuff but i'm allways too lazy to search and install them. so i select the polygon, hit key + (hide all unselected polies) switch to point mode, lasso select the points, switch back to poly mode, delete the poly, back to point mode and average weld. (select, +, ctrl+g, select, ctrl+h, delete, ctrl+g, w [i use the key w for average weld instead of info]) this works fine every time and if i have too complex structures i use the info window to select all visible points | 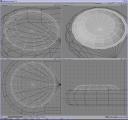 |
| go to a new layer (or not, it's up to you) and create a ball. place it at the center of our 'crater' and try to fit it into the hole. use 8 sides and 8 segments. select the bottom part of the ball and stretch it until it fits into the hole. now delete the 8 polies on top of the ball and merge them (key shift+z). bevel this new poly a small step inside and shift it a little bit inside the ball, use the secondary mouse button to bevel 2 or 3 steps more to build a small dent inside the ball, this is for the thumb. hit 'tab' to check if the ball looks like we want | 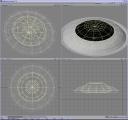 |
| ok, now we want to create the 6 buttons. go to the layer where we copied the other disc. bevel this disc a litte toward heaven so it will have the same high as the border. bevel the disc 3 or 4 millimeters inside. kill the disc we don't need it anymore. now create a smaller disc with 8 sides and 3 segments. use a radius of 6 mm and a high of around 5 mm. select this disc and use the rotate tool now, change the action center to selection and rotate the disc 22.5 degree. select the bottom polygon and bevel it a little outside (0.5 mm) and then shift 2 times up (around 1 mm per step), last bevel it around 2 mm outside. delete this disc. select the top disc and bevel it 2 times around 1.5 mm inside, delete the disc and average weld the points. now create an array of 3x2 disc's with the array tool from the multiply menu. if the array doesn't fit into our previously created disc just hit undo and strech the points from the border a little bit inside. | 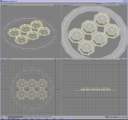 |
| copy the buttons to the first disc if you worked on a separate layer. now we have to do some little 'select points - create poly' stuff. first create 4 polies between the buttons. after that weld and create polies to connect the buttons to the outer disc. i don't want to explain each single poly so just look at the image and try to do the same ;-) two ways: just create one side and mirror the new polies to the other side or create both sides if you don't want to fitting around with the mirror tool. | 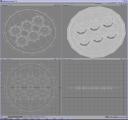 |
| ok, now back to ther very first piece we did. kick the poly from the top and select the two polies between the disc and the two polies on the bottom connected to those 2 we've selected some seconds ago. use knife to cut those polygons, place it on the center of the controller. deselect the polygons except the polygons on one side of the controller which will be hold the big buttons. use knife two times for each side to cut these polygons again. turn to the bottom and switch to point mode. select the points in strange position and weld them with the center point. sounds strange but look at the picture and you'll understand it. | 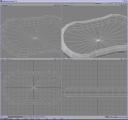 |
| now move the parts between the disc's a little bit inside, do it how you like and check with hitting tab if it looks like you want. copy the big joystick and the six buttons in one layer and start to connect them with 4 point polys. just connect them and cut them with knife at the middle. kick the two polies at the big button side or cut them with knife and connect the inner points to the middle point. copy this object to the main body of our controller. merge or weld the points from the two parts but be carefull with 'fixed merge' better select the points you want to merge befor. if you've deleted the polies on the big button side just create them, otherwise merge them properly. after switching to subpatch mode via the 'tab' key our object could be look like this. | 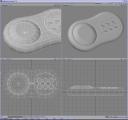 |
| back to the buttons. this flat version looks kinda stupid and it's not like the original. select the 6 buttons including the surrounding polygons (leave 1 row of the 'disc' polygons beneath the notch unselected) then use the magnet tool to curve out the keys. play a little bit with falloff and radius until you get a smooth and round shape. i use radial and i define the range with building a shape with the secondary mouse button, include all selected polygons. don't care about the outer ring of unselected polygons, if you finish your shape just use the move tool and move the buttons upward until you have a nice round shape and a similar high to the joystick. (put it in a background layer) after some tweaking should the result look like this picture. | 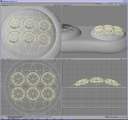 |
| so, the buttons are quit unergonomical at this moment so use the last selection and expand it with '}' until you have the notch included. cut it and paste it back, select some polygons and select all connected with ']' and use rotate to rotate the selection 22.5 degrees counterclockwise. thats maybe not the best position but we need it to paste it back correctly. merge the points with 'merge automatic' you should get a message '16 points merged'. if not, you can see the non merged points, they are located between some sharp peaks in the polygonstructur. switch to polygon mode (no subpatch) select the points and weld or merge them manually. if you still have selected the polygons hit 'q' and type in something like small_knobs or so. use a black color and some specularity so that we can see the surface better. select the joystick cave and give them a similar surface with the name 'joystick_body' | 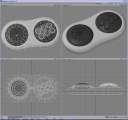 |
| there isn't so much to do left. we still need the big buttons and a small notch around the controller. we will do this in one step because we can save some work. we have to select the polygons around the controller. if you use lw7 or higher just select two polies and then switch to bandsaw or bandsaw pro, otherwise select all the polies and use the knife tool. we need two cuts, around 40% and 60%. now switch to point mode. if you have used the bandsaw the points we need are selected now, if not use the 'select points of selected polygons' trick i had explained above. smooth shift these points around 0.5 mm outside to keep the round shape of the controller. | 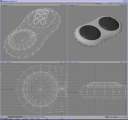 |
| back to poly mode, we need the line of polies between our previously cuts. select the line manually or use bandsaw without divide to select the line. now use smooth shift and shift this line around 1 mm into the body. if you want really sharp borders then do this 2 times (you have to adjust the max smooth angle to avoid a scaling of the notch) but i think only one step should be ok. you can change the size of the notch with moving the points of our cuts closer together. | 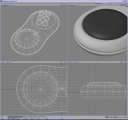 |
| now go to the place where the big buttons are located. select the polygons for the buttons. it's ok if you are work on one side only and mirror the part later, so we can save some time. select smooth shift and click with the primary mousebutton only once but without moving the mouse, switch to move (key 't') and move the selection around 2 or 3 mm into the body. deselect the polygons except the small ones from the notch. use move to move the polygons to the same position like the other polies. (what the f#$% is he talking 'bout?) ok, check the picture and you'll know what i mean. | 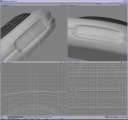 |
| next step is to weld some points. toggle to polygon mode (key 'tab') and then switch to point mode. if you zoom close to the polygons we've just moved you can see some points close together. weld those points and then use statistics to select the 2 point polygons and delete them. | 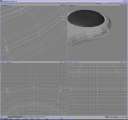 |
| select the polygons at the bottom of the ditch. hit 'q' and give them a surface called 'big_buttons' or so. then smooth shift the button 2 times. use the 'click with no shift and move' trick to avoid strange shapes. first step is to the border of the body and the second step is out of the body. you can tweak the shape of the button with moving some points closer to the border or just keep it like it is. now mirror the part of the controller or do the same on the other side. | 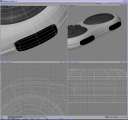 |
| so, that's all, i think you are able to add a cable by yourself. just some hints for the texturing. i used an uv map for the bumpmaps for the small buttons. just select the top of the buttons, create an uv map with planar mapping on the y axis. make a screenshot of the map, go to your pixel program and place some numbers at the right positions. about surfacing, check my 'hdri lighting' tutorial for some hints. add some noise bumpmaps to the body and a gradient for the reflections to simulate the fresnell effect. | 
|
| related links: hdri lighting speed up hdri renderings http://www.dbki.de/index.html tutorial index at dbki |