Run with Gun
Program(s): Maya 4.x
Source file(s): 2guysW_guns.for4.0.ma 2guysW_guns.for4.5.mb
Tutorial on how to constrain a gun to a character's arms while running.
Problem: You have a character running and he is holding a gun with both hands - one on the trigger/handle, one on the barrel. Now as you keyframe the run, and attempt to keyframe the hands and gun to stay together, you'll find that it will take a lot of keyframing and a lot of tweaking curves. Someone brought this problem up on the highend3d mailing list, and this is the solution I came up with....
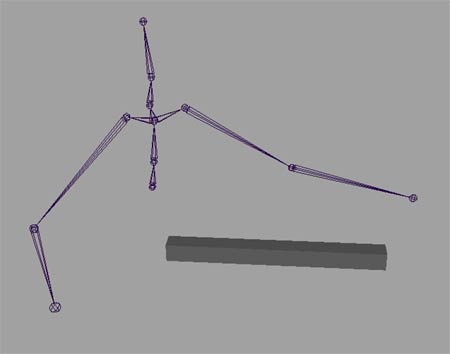
First, you should have your skeleton made, and a gun made. <poof>

Pretend the box is a sophisticated gun, and the skeleton has a big burly character attached to it :)
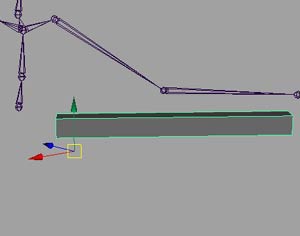
Freeze transformations on the gun and move the pivot point to where the trigger/handle will be:

Now create 2 locators - I named them handleLOC and barrelLOC.
Select the gun, shift select handleLOC and add a point constraint (animation menu set, constrain > point)
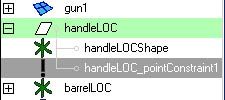
The locator will snap to the pivot point of the gun. Now open up the outliner, expand the handleLOC and delete the point constraint that was just made.

Now freeze transformations on handleLOC. What we just did was place the locator at the same point as the pivot point of the gun, this was just a fast and clean way to do that.
Place the barrelLOC on the gun where you want the 2nd arm to hold onto it. Freeze transformations.
It should now look like this:

Select the handleLOC, and shift select the Gun. In the animation menu set, select constrain > point.
With them still selected, add an orient constraint (constrain > orient). Now when you grab the handleLOC and move or rotate it, the Gun will follow.
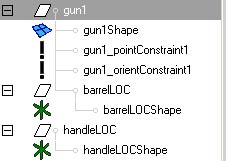
Select the barrelLOC and shift select the gun. Hit p for Parent.
The outliner should look similar to this:

Now we move onto the skeleton. Add IK to the arms (skeleton > IK Handle Tool) Make sure you have it set to RPsolver. You need the rotation plane for aiming later on. Add IK by selecting the shoulder, then the wrist. Apply to each arm. Again, name these appropriately - I named mine rt_IK and lf_IK. You should be at this point:

Grab the "barrel" ik handle - in my case its lf_IK - and move it into holding position on the barrel. Since my skeleton does hand a hand, i just snapped the IK handle to the locator using point snapping.
Now take the grip ik handle - my rt_IK - and move it into holding position on the grip. Again, I snapped mine to the locator. It should look decent now, as if the character is actually holding the gun somewhat properly.

Now select the lf_IK (the barrel IK handle...) and shift select the barrelLOC. Hit p for Parent.
Select the handleLOC and shift select the rt_IK (the handle IK) and hit p for Parent. You should have a good understanding of who is driving who by now. If you dont, make sure you have the outliner open and take a look at who is a parent of who.
At this point, you could be finished, but as you may notice, the gun has no aim to it. Right now, the only thing you have to animate is the rt_IK handle. that will drive the right arm, the gun AND the left arm.
To add aim:
There are multiple ways you can do this. First i tried adding a pole vector locator to behind the elbow of the right arm. this would then drive the aim of the gun as well as the ebow aim, but then I found i would sometimes have to edit the twist attribute of the rt_IK. It works great though, you're still only animating 2 things.
You can also just rotate the handleLOC and that can be your aim for the gun. To make things simple for this, you can add a third locator, somewhere in front of the gun. Freeze its transform, then add an aim constraint to the handleLOC to your new one. With the locator in front, it makes the animators job easier when selecting things.
You could also take the wrist joint (assuming your character has a wrist unlike this tutorial non-character :)..) and add an expression, or simply connect its rotation values to the handleLOC.
As you can see, there are a ton of possibilities :)

Feel free to email me with any comments/suggestions/questions.
The maya scene file will be released in our next Artpack in December.