Modeling Using CPS
Modeling using Connect Poly Shape
After receiving a few requests to write a tutorial on my technique for modeling a head in Maya, I've decided to demonstrate exactly how I would go about making one. When modeling a head in maya, you always want to result in a detailed, yet clean model. Nurbs patches are a great way to get this effect, however, this is not always the best approach. For the less technical people, they prefer an easier yet just as powerful modeling tool. So the resulting geometry is not about getting over that hill, but about what was actually in the artist's head. I'm not saying this is the best method, but it certainly will be for many.
First of all, load Maya unlimited, or download Dirk Bialluch's Connect Poly Shape 2.0 script from here and install it. For this tutorial, I will use CPS 2.0 though the same method can be used with Maya subdivisions in polygon proxy mode.
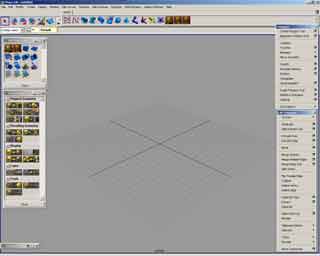
At this point, you may want to tear off the Polygon and Edit Polygon menus and bring up the CPS Control window and the CPS Poly Tools Menu. You can turn off all the other menus and channel box etc... This is so that you have easy access to the tools you need and conserve space by getting rid of the things you don't.
This is how I have chosen to customize my layout though not all of you will prefer the same:
Ok, now that we can say that we are ready, lets start up by creating a polygon. From the Polygon menu, choose your Create Polygon tool. Now go to your front viewport and click four times in a clockwise manner. Each time creating a vertex in your polygon. Now hit enter. You have now created your first polygon. Note: When creating polygons, you can create as many points as you like, but I recommend using combinations of Three or Four.
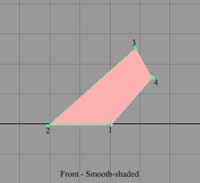
(Creating the first polygon.)
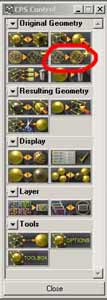
While having your polygon selected, click on this icon on your shelf.

This brings up the Connect Poly Shape 2.0 script window.
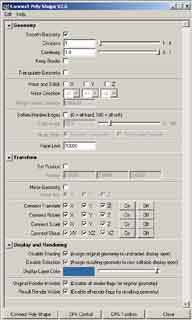
Make sure to turn off Keep Border, set the Face Limit to about 10,000 and check that Connect Translate X Y and Z are on.
Now click the Connect Poly Shape button in the bottom left corner of the window. You should end up with something that looks like this: I normally use this first polygon as the corner of the eye area.
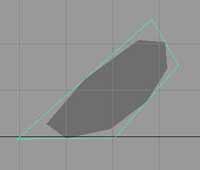
You may want to click the Increase Subdivisions button in the CPS Control window to boost the smoothness a level. This is not necessary however.
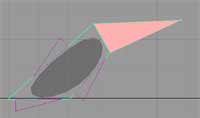
Next we are going to use the Append Po Polygon tool. The Append To Polygon tool is located in the Polygons menu, just below the Create Polygon tool. To use this tool you must first click on the edge of an existing polygon, then continue clicking elsewhere to create the other vertices. Again, it is best to go around in a clockwise order. You will notice that when you click on an edge with this tool, a green dot appears on one of the edges, this means that you must go clockwise from that point. Note: is you feel you made a mistake, you can hit the Backspace key on your keyboard as a mid-operation undo, or use the Insert key to move a vertex around before hitting enter to create the polyon.
Keep going around plotting the points for the eye. Note: You can start using an edge, you may also end using one.
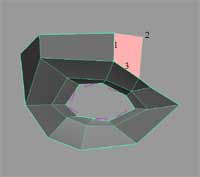
After this, you can now keep hitting the Y key on your keyboard to repeat last tool after creating each new polygon to speed up the process. Here i have appended to the polygon a few more times and moved the vertices around a bit to finish the eye area. I also used the Split Polygon tool a few times to create a little more detail in certain areas.
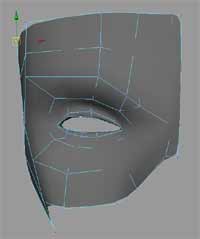
Next you can use the Append tool, the Split Polygon tool and the Extrude Face tool to add some more detail into the face.
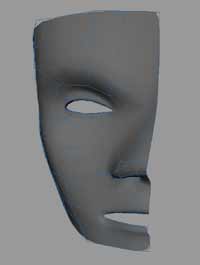
Now here I've deleted the resulting mesh by hitting the Delete Resulting Geometry button in the CPS Control window. I duplicated the mesh and scaled to -1 on the X axis. After that, combine the meshes using Combine in the Polygons menu. Next, you can go ahead and reapply the CPS script to your new object. Now you can append to polygon in between each side to create a bridge between the two. You can also use the Merge Edge tool to merge a couple edges that are near each other.
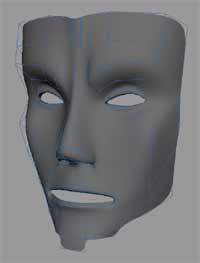
Next, select all of the edges at the top of the face and extrude the edges using the Extrude Edge tool under the Edit Polygons menu. Make sure that you have Keep Faces Together checked. To find out if it is on, go to the Polygons menu and under Tool Options you should see a check near Keep Faces Together. Immediately after clicking on Extrude Edge tool, switch to the rotate tool and move the pivot to where the ear would be. Do this in the Side View using the Insert key on your keyboard. Hit insert again after positioning your pivot and rotate the extruded edges to their new position.
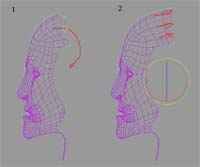
Keep doing this until you have gone all the way to the neck where the neck would begin.
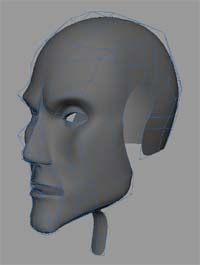
Next, extrude these edges all the way round to the front and start appending in between them.
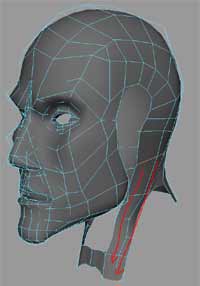
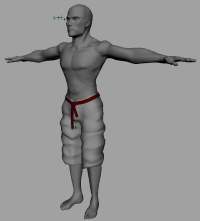
Now keep Extruding edges down the body, making sure to follow body contours and you should end something like this.
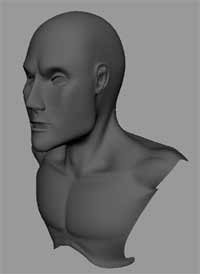
Well by now you should have a pretty good idea about how to use this method. If you are modeling characters, I also recommend that you pick up a few muscle magazines and anatomy books, they really help.
