Palm Tree
Applications: Rhinoceros 3D
This time we will focus on how to make a quick tree in Rhinoceros.This will take you through the steps of creating a paml tree, I hope you enjoy this tutorial.
----- The first thing you will have to do is to create a closed interpolated spline. This will be the basis of the leaves.
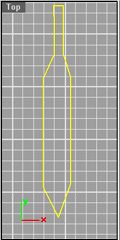
Figure 1
Leaves Base
----- The next step is to get a surface out of the polyline that you just previously drew.
There are many ways to do this, but this time we will use patch. Use the command patch and select your polyline. A message box will pop up asking you to set parameters. The more Suface U spans and Surface V spans you set in that message box - the more points you will get on your leave for starters.
The U and V spans in the picture below are at 10. It is probably better to start off with less (around 4).
When done entering into the message box, press enter and now your polyline has been patched. It is now a surface rather than a spline, yet both objects remain in the scene (the polyline and the surface).
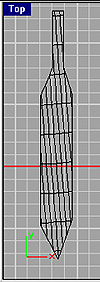
Figure 2
Patched Polyline
----- Now you need to edit points on the leaf so that it isnt totally flat. Type the command showcv into the command bar. Select your surface and press enter. Now all points on the surface will be shown as in below.
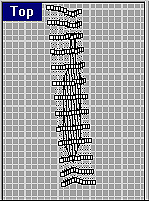
Figure 3
Displayed Points
----- Now that you have all of the points, we need to edit them and "pull them" to make it more believable looking. Grab and pull the points until they look good to your liking. They should look as if they had low spots and high spots dented, as the one in the picture in right view below.

Figure 4
Indented points
That was the a leaf, now onto the trunk
----- For the trunk we will take a new route in Rhino. We want it low poly so we will make it with 8 sides. Remember, this is low polygonal for game use, and such.
So detail is not what we are worrying about at this present momentm textures will be added for detail later. We will use Cross Sections to start the trunk of the tree. This means that you have to draw 4 splines similar to the ones in Figure 5.
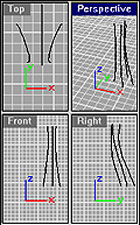
Figure 5
Trunk splines
Use the interpolated spline. The reason why you use a interpolates spline is because you want them smooth, and no jagged edges, if you can help it.
We will have some jagged edges because of turning to low poly, though.
----- Now that you have the 4 reference splines, we can go ahead and make the cross sections by using the command CSEC. This will make cross sections so that we can loft a surface from its curves. Once you've typed in CSEC, you will have to draw lines across the refrence splines.
(Do not select polyline or interpolated spline buttons while making cross sections. CSEC will suply the ability to draw lines across the refrences).
Use the Figure 6, below to get a idea of how the cross sections should look like.
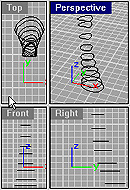
Figure 6
Cross sections
----- Now you can loft the surface from these cross sections. You will have to choose a lofting type as a message box will pop up and ask you.
In the Figure 7, I have used a normal loft with 10 control points and no simplification.
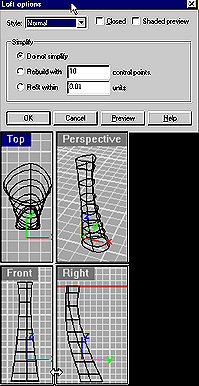
Figure 7
Lofting type
----- Once we have the tree trunk lofted, we should fit everything together.
Begin by copying the leaves and branches over and over again... you may want to do them in different layers, but it isnt totally necessary.
The picture below shows what I have done so far, without transporting nurbs to polys. This tree below is textured, yours may not look the same.
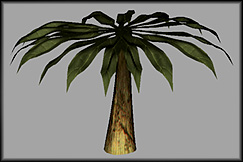
Figure 8
Completed Palmtree
----- Now to convert to polys and keep the faces down, select all and use the mesh command. This will bring up a message box asking about the mesh content.
First off there are 2 kinds or meshing controls: simple controls and detailed controls.
For this project we will use the simple controls.All that you have to do to get low poly mesh out of nurbs in rhino is drag the triangle to the fewer polygons side.
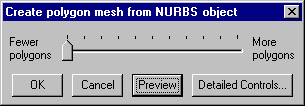
Figure 8
Nurbs to mesh
*NOTE* You may be able to get lower polys and lower face count out of a application such as 3D Studio Max