Vegitation
Applications: Rhinoceros 3D
Concept SketchesConcept sketches can sometimes mean the difference between a quality model and a poorly built one. With concept sketches you will have a sense of what you want, and having it planned out will get the project done much faster. I would recommend drawing a concept sketch for any project that you do, it will help you get it done faster as well as better. Figure.1 shows a rough concept sketch, which is slightly different than the final product.
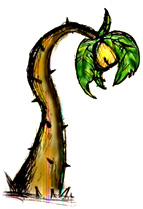
Figure.1
Concept Sketch
Modeling in Rhinoceros
As you may have read Rhinoceros 3D 1.0 encorporates some of the best and recent nurbs modeling tools that are on the market. With this comes a masterfull Nurbs application that you can use to create absolutely anything. With being a powerfull modeler, Rhinoceros has major limitations in rendering and surfacing, as well as no capabilities for animation. For this it would be most beneficial to use another application for surfacing, rendering and animation.
Modeling in Rhinoceros can be quite simple and with the right learning tools. Rhino's interface is also interchangeable and it may benefit you to download a new and more colorfull interface, if you dont already have one. You can download some custom workspaces at the links section of www.rhino3d.com
The Trunk/Stem
There are many ways to make almost every object known to man. With this particular object we will look specifically at the loft tools. The loft tools can be used in different ways and forms, so lets take a look at how to model a tree-ish flower with the fictional name of Weeping Ame.
To start the model we will draw a set of 4 profile splines to model the stem, or trunk. The type of splines that we will use on this project will be interpolated curves. We will use interpolated curves because they are smooth and flowing. The second style of curve, the polyline, is not flowing and has jagged edges.
In Figure.2 you will see the 4 profile splines completed. Once we have the splines drawn we will have to loft then to make a renderable surface. To loft you will need to type Loft into the command line and press enter.
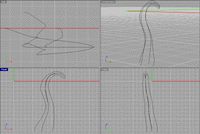
Figure.2
Profile Splines
Now you will have to select your splines in a counter, or clockwise fassion. It doesnt matter which way as long as they are in order. Once your splines are selected you must press enter and then you will see a loft properties box popup. Use the settings as seen in Figure.3. Check the shaded preview box and press preview to view a quick render of your current loft object.
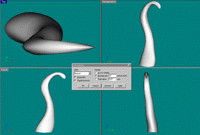
Figure.3
Loft Settings
The terms and buttons of the Loft dialog box
- Closed Loft: closes the surface (In this case we do not want to use this.)
- Shaded Preview: When quick shade is activated, it shows the current loft
in progress in a shaded view.
- Do not simplify: Uses the current set of points on a spline to determine
where isoparms will be located.
- Rebuild with **: Rebuilds a surface using ** number of isoparms (** is a
number you indicate).
- Style: Determines how your surface will be generated. Normal builds it with
normal tightness and so on, while straight sections build a surface
with straight sections at each isoparm. The splines are set in different
colors for ease of understanding.
The Leaves
Now that you have the trunk/stem of the Weeping Ame we will work on the leaves. Figure.4 shows the splines in different colors to ease understanding.
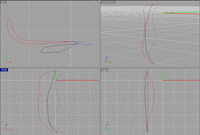
Figure.4
Coloured Splines
All of the leaves splines are interpolated curves. This time as we loft we will use different settings. This surface will be open and only use 3 splines. Use the Loft command as you did previously, but use the settings as you see in Figure.5. You can also see the loft preview in the previous figure.
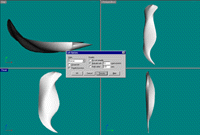
Figure.5
Loft Options
Once you have completed lofting the leaf you will need to mirror, and copy them over quite a few times as seen in Figure.6. All leaves are in different colors to show where to place them.
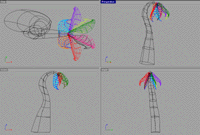
Figure.6
Mirrored Leafs
To access the mirror and copy tools, simply type Mirror, or Loft into the command menu. Once this is done you will have a stem/trunk and 10 leaves completed. Your scene so far should look similar to Figure.7. To do a quick render as seen in this figure, use the ShadeAll command, all viewports should become shaded.
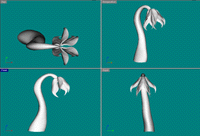
Figure.7
Shaded Preview
The Flower Petals
The flower petals are modeled in the same way as the leaves were, and are very similar in all aspects. This is where we have decided it would be best to have a different output than as our concept shows. Figure.8 shows the interpolated curves needed to form the petal surface. Each spline is set in a different color.
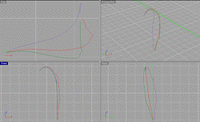
Figure.8
Interpolated Curves
To build a surface from these splines we will go about it the same way as before in the previous steps. We will use the loft tool and make a open surface (Make sure the Closed Surface box is unchecked.).
A surface should be generated such as seen in Figure.9.
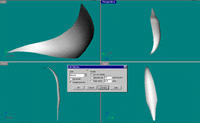
Figure.9
Surface
You will now have to mirror, copy, and rotate the surfaces as shown in Figure.10. Use the respective commands for each, such as Mirror, Copy, and Rotate.
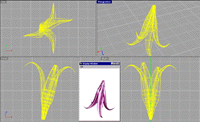
Figure.10
Transformed Surfaces
Curled Leaves
For the curled leaves that are attached to the large leaves you simply need to copy, scale down, and rotate the smaller leaves over to the other side as seen in Figure.11. The mirrored and copied leaves are in purple. These leaves are the same as the larger ones in every way, so there was no need to model new ones.
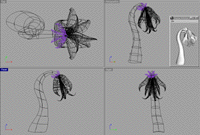
Figure.11
Smaller leaves
Spikes
For the stem/trunk we will be adding splikes. You can do this 2 ways, if you are in a large rush you can use cones as spikes. I would recommend using a different method. For this we will use the tool named 2 rail Sweep. This method uses one curve as the cross section, and 2 curves to sweep along. We will be using interpolated curves for these surfaces. Figure.12 shows the splines drawn in different colors.
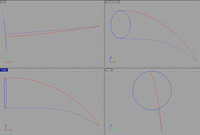
Figure.12
Coloured Splines
You will now need toaccess the Sweep 2 Rail tool by using the command Sweep2. Press enter and select your 2 rail curves (the ones in Red and Purple.), then select the cross section, which is the one in Blue. Once you press enter you should see a dialog box pop up, use the settings as seen in Figure.13.
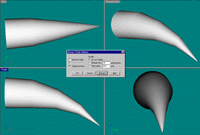
Figure.13
Sweep2 Settings
Finishing up the model
Once you have completed the tutorial up to this point, the only thing that is left is to copy and scale the spikes all over the trunk/stem. You can view this in Figure.14.
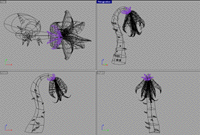
Figure.14
Adding spikes
Surfacing
Surfacing is the last and final touch that you normally do to a model. It can take a object from plastic to realistic, and from coal to diamonds. This is no different with trees and flowers. With these models you should use bump maps and more. When bump maps are applied to a textured object correctly it will appear as it the veins in a leaf are raised and so on. Adding specularity maps would also be a good idea. Specularity maps describe where to render highlights.
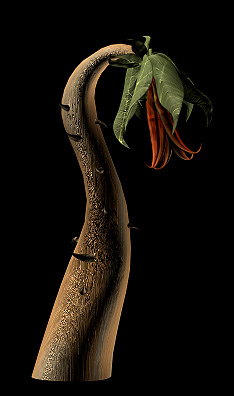
Figure.15
Mapped Model
Most of these maps are done in grayscale, where the lighter shades add the specularity or bump, and the dark shades are not affected. Different applications take different approaches as to how each map is implemented to the model, but inm ost programs there is the option.
Conclusion
Rhinoceros is a great modeler and has hundreds of tools in which can make you work your absolute best, and show it in your models! As with any application, this may take a bit of time. With this tutorial we took a look at only a few of the many tools available...