Next is the tricky part. Move
your camera (first from the top view, then left or right) until the
viewport grid (ground plane) matches the grid you created in your
reference image. Make sure you maintain the match between the
horizon lines.
When you believe you have achieved a match, create
some dummy geometry to represent the structures in the scene. This
will allow you to see the accuracy of your match. A plane on 0,0,0
(your viewport plane origin) would be your ground plane. Tweak the
lens/field of vision (perspective) as
necessary.
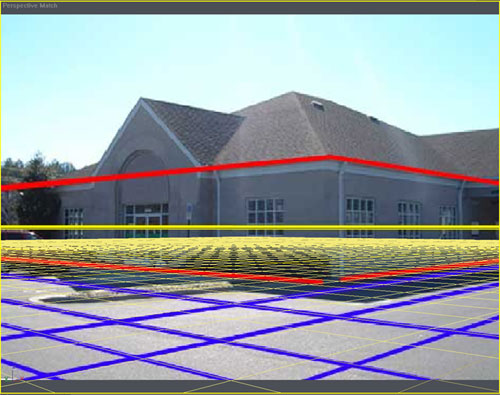
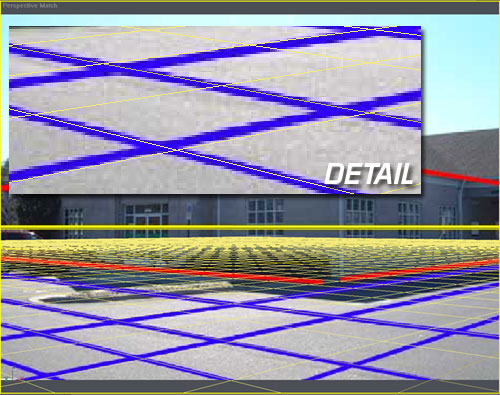
Almost there. Note that you do not
need to match your grids perfectly, just the relationship between
them. The Yellow lines are our viewport grid
lines.
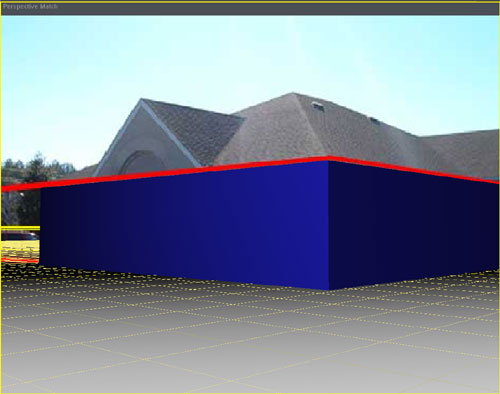
There are a number of variables that will
effect the accuracy of your match. If the focal length and the
perspective of the virtual camera and the reality camera differ,
there will be deviations between the two.
Now that you have your camera placed and
your dummy geometry in place, you can approximate the lighting. Here
is a simple way to visualize the general location of the light
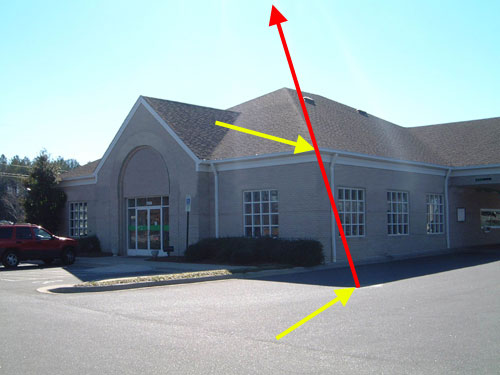
source in your scene. Match a point in the scene with the same point
on the shadow. (these are represented with two yellow arrows)
Connect the two points and you will have the direction of your light
source.
To further add realism to your
composited elements, make the color of your shadow match the
existing shadow color.
Our scene is set up and ready for our 3d
elements.
Let me introduce a good friend of mine, the matte
material. In 3dstudio, the material is called the shadow/matte
material. We will assign this material to our ground plane, in order
to 'catch' the shadows of our composited items. (make sure you have
accept shadows on) An example of how the matte material is useful is
illustrated below. The matte material is handy when you want to mask
out areas in the scene that your 3d objects move behind. Below, I
built the extruded triangular roof element, and assigned it the
shadow/matte material, then placed the ball behind
it.
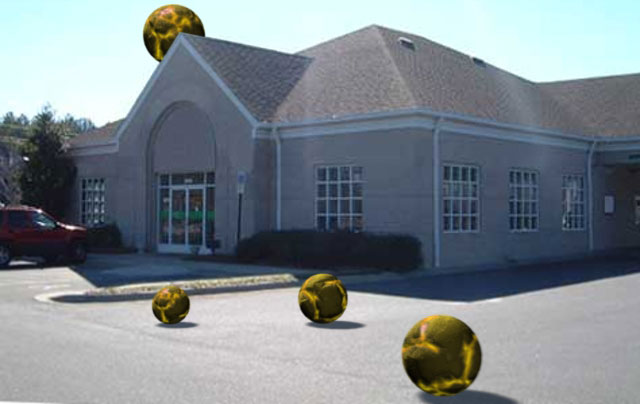
As a final note, it is an artform in itself to
get your composited elements to blend realistically with your
background. I will delve more into this topic in version 1.2 of the
tutorial. Don't be afraid to rip textures directly from your image,
as we did with the color vaules of the shadows. Use blur and pay
attention to the saturation of the colors of your composited
elements (I obviously didn't ;P)
As always, this is just one way to get the job
done, it has worked for me and allowed me to do this type of work
extremely quickly. Hopefully it will work for you.
Enjoy.
-Bruce


