heavily unfinished - in progress - stay tuned
| content: create a landscape with lightwave. this tutorial is for
tasks where you have to create a specific shape (game level etc). it will
explain how to create the basic shape, how to modify the shape with
details and how to optimize the mesh. next step is texturing the landscape
and how to render the landscape. last step is how to create a landscape
for realtime purposes with the tools we've used for the first
steps. | |
| part1: modeling part2: texturing/rendering - in progress part3: optimizing for realtime usage - in progress | |
| part1: modeling | |
| it is a common problem to create a complex and detailed
landscape realistical games and visualisations. this tutorial will quide
you step by step through the necessary operations and will try to show you
pitfalls and problems. i will try to show you the creation of a landscape
for a stil/animation project and the creation of a landscape for a real
time game the very first step, you have to know what kind of landscape, the size of the landscape and how to use the result. we will try to work with a desert like landscape and a landscape you can find in areas with mountains. about the size, the desert is mostly a big area, you can see a large terrain but the details are only close to you. the mountains, allways a problem to avoid the feeling to sit in a valley. so we will combine a mid range valley with mountains. if you need this landscape for a real time project you have to know what is the maximum polycount you can handle and how to texture the landscape. many game engines require a minimum density for the mesh to ensure that the lighting will work correctly. | |
| but let's start with building the landscape now. i
will use a sketch as a imagination of how the landscape should look like.
if you have to do a scape for a game or something like this you will get
this from you art director or there is a general guide for the look of the
project. since we want to create the scape with displacement we'll need a
bitmap. you can paint the whole elevation map with a programm like
painter, photoshop or gimp but i prefer for the first step a vector based
program like corel draw or something similar. first, create the main place
(valley or beach or what ever). use a freehand curve for this step. change
the shape like you need it. then continue placing curves around that place
for the mountains. create long shaped curves for the base and smaller,
round curves for the top of the mountains, like shown in pic 1. |
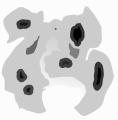 |
| then create transitions between those shapes. i'm
not sure how to make this with other programs but with corel draw it is
quite easy. you can change the 'slope' with a slider, just move the
gradient closer to the top or to the bottom of the 'hill'. i prefer to
work with an inverted picture because it looks more friendly and the human
eye is more sensitiv for minor changes within bright colors. (ok, also
depending on the monitor) just want to mention it. you can also try to use a DEM (Digital Elevation Models) to create a rough shape and start to modify this file then. if i'm finish with this tutorial i will try to explain how it works. |
 |
| if you have the basic shape of your landscape export it to a bitmap file. keep in mind the resolution of the landscape. if you plan to make an area with around 100x100 meters (300 feeds) and you want detailed hills you forced to export an bitmap with more than 1000 pixels for each dimension. now load it into your prefered paint program. we have to smudge and to erode the landscape to achieve a more natural look. you can use bryce for this step too, it comes with good erode tools but i found it's kinda slow with large bitmaps. one solution is to add noise and then smooth/blur the image, using some strange brushes for smudging and other effects. after some work the image should look like pic3. | 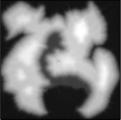 |
| that's not final, indeed, but should work for the
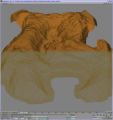
first tests. pic4. the landscape is shaped very well (do not despair, the
image you can see on the right is not really based on the picture we build
above, i don't have the older pictures) be aware, the image is around 230k
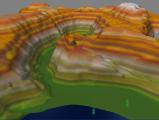
in size, jpg don't like wireframes. we can easily verify the shape and the high of your landscape if you add a gradient texture to the surface. use a planar map, the axis should be a horizontal direction (for lightwave x or z, other packages may require x or y) you can find such gradients on many pages about geography, or on pages containing profiles of landscapes like DEM or other satellite pictures. maps for traveling using such gradients too. |
    |
| based on the resolution of our landscape we will encounter the problem that we have steps in sloped areas. to avoid this with lightwave for example you have to try if you subpatch the area befor the displacement or after. if you add the displacement befor the subpatching of the area you will get a very smooth area. that's not in all cases the best solution, especially for rocks or similar landscapes. as you can see you have only sloped areas or very flat areas. this is based on the way lightwave is displacing a mesh. the displacement maps are influending only the points. this is good to get some slopes in one case but it's bad if you need a long flat slope because the resolution of the displacement is too low. another idea to avoid this is to use a big displacement map for the rough shape and some smaller displacement maps for local details. but you have to place and to scale them well and if you need changes you often have to change multiple displacement maps. and you have to remove the displacement from the large area displacement because the little displacement will move the part of the landscape up and down. so a lot of fine tuning and positioning is necessary. | 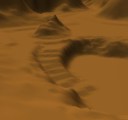 |
| so every hill or mountain is shaped with a mixture of slopes, paths, steps and holes. we have to add such stuff. but how if the resolution of the mesh is too small? one solution is to add details to the mesh where you need them. i did this with subdividing parts of the mesh and merging the points around this area. so i'll have different resolutions. this is good because you'll have a lot of polies where you need them and you can use lower mesh density for parts where you never want to go. another way to keep the polycount low is to cut all unnecessary polies (places you'll never see, in our case, we are only on the beach and inside the valley so the outside of the mountains is not visible at all) | 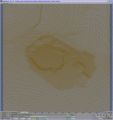 |
| since we are happy with the main landscape we start with another texture. place the landscape as a layer in your pixel program and paint on a new layer the details like holes, paths etc. if you only want to paint some paths you can merge the layer and everywhere you have painted a path the landscape will be lowered as much as you have set your opacity for this layer. unfortunately, if you have a path on a sloped area the path is sloped too because the layers are simply merged. you will encounter another problem, lightwave for example can use 256 values only for a displacement or bump map. so if you want to create an area with hills around 100 meter high you have steps of around 40 cm :-( (as i mentioned befor with the steps) | 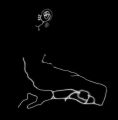 |
| the modeling is nearly done, here some pictures of the mesh with different subpatchlevels. if you want to optimize this you can try to use a mesh with a lower base resolution and higher subpatch level. so it's possible to be more sensitive with the polycount. for example a mesh with 500x500 polies will create a final mesh of 250000 polies for subpatch level 1 and 1 million for subpatch level 2. if you use a base mesh of only 100x100 polies you will get a final mesh with 10000 (1), 40000 (2) and 90000 at subpatch level 3. (base mesh polycount x subpatchlevel^2 = final polycount). | 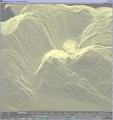 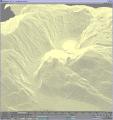 |
| you can also try to add some procedual maps to the
displacement, like noise or crumple to unsmooth the landscape a little
bit. also usefull is a bumpmap but this will change the visible shape and
maybe you'll come into troubles when placing stuff on the landscape. but
you can use the texture for the paths or a special texture of paths and
areas to use this map as an alpha map to adjust the bump/displacement
level on specific places. so. i'm waiting for your input, maybe some parts are too short or not really clear and i'm still working on the other parts so i can do something for the first part too. send your suggestions via email |
 |
| continue to part 2 - texturing and rendering | |
