kinda unfinished - in progress - stay tuned ;-)
| part2a: texturing/rendering | |
| ok, now we want to start with the texturing. the
main credits for this part are belong to olbi, i just try to put this into
this lines ;-) this part is heavily depending to the landscape you'll do. if you just need a moon or mars like area you don't have to spend so much effort into it. but that's not what we want. our shape is based on some desert/mountain style terrain. the first step is to check references. search on the web for pictures of similar areas or look for books and pictures. this is really important because artists ignoring this often and our imagination is connected to our possibilities and so we think it's right because we're looking since hours or days on the same stuff. i will descipe the steps for our desert valey. we need textures for 3 main parts. the top of the mountains, the sloped areas and the ground. there is not lotsa sand on the top of the hills because of the wind and rain (ok, this will produce sand, called erosion but this sand takes his way down to the valley then) so this part will be rough and with many small differences in color. the next part is the sloped areas. here we'll find solid rock, with many cuts and nice colors (you know those horizontal layers - reminds me of milfoy, great french candy). last part is the ground. this will be full of sand, ripples, stones and other stuff like grass and whatsoever. here some examples, the desert is taken from some satelitte pictures and is 2080x2080 in size, we mapped this textures planar on the whole landscape, the others where used for the sloped areas. |
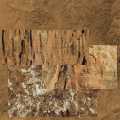 |
| first step after getting references and pictures
for our textures is to match the colors of those textures. it will look
little bit stupid if the top is green, the slopes red and the ground more
orange or white. if the textures are close together you can play with hue
and saturation to match the overall appearance. if your prefered textures
really different you have to do this more drastically. try to desaturate
the textures and add a layer to all of the textures with the main color
you want to achieve. then use color as merge mode and adjust the opacity
value until it's like you want. here two examples, the original size was
2000x1500, you see a part of the textures (low jpg quality now). left is
original, middle is the version for main usage and right for some special
areas. fortunately, we don't have to adjust the bumpmaps ;-) the resolution is required because we want to use this texture for an area of more than 10000 square meters and it doesn't look nice if you strech the texture below 4x4 meters and if the texture is tiled too often you'll see the repetition on the landscape. |
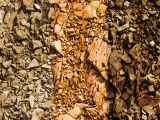 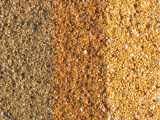 |
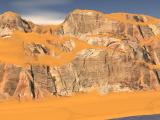
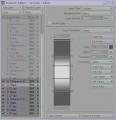
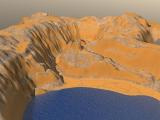
| now we want to add those textures to our object. for this step it's a good idea to reduce the subpatchlevel, you'll get a more realtime like update behavior. it doesn't matter with which texture you start but i would say we take our texture for the top (and ground) area and map this texture planar on the y axis (that's the vertical axis if you use lightwave, otherwise use the z axis, for example 3dsmax) move it around and try to scale it until you have the feeling it is usefull. don't care about the slants. then add another texture, this big desert picture for example and play a little bit with opacity. you will see the landscape doesn't look bad now. the shadows are not a problem, on a sunny day with lot of radiosity and all those cracks and fractures you'll have a lot of strange shadows. and if you don't use an opacity of 100% it will be overrided by our shadows later. we use 2 or 3 of those layers with different sizes to change the colors and brightness of the whole area. look at the pictures on the right, you can see the layers i added and how it will look after rendering. as you can see, i use a modified version of the paths (we've used this to create the displacement) as an alpha channel. this is usefull to create different grounds for the area and for the paths. you won't find a lot of big stones on areas where a lot of people walking. | 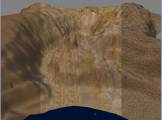 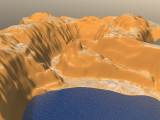 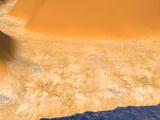 |
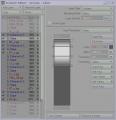
| i think now it's time to explain how the whole theory works. check the screenshot and you will see all those layers. you can see the images i used and the layers above. we use those layers as alpha channels to define under which conditions which texture is visible and which one not. the main part is slope. the visibility of the texture layer is determined by the slope of the area. this give us the capability to use different textures for top, bottom and sloped areas and the areas between this 3 main parts. the next magic thing is 'distance to camera'. this value can be used to blend different sizes of one texture to avoid low res textures for close ups and sensless repetitions for far view renderings. next possibility (not used for our example) is to use the 'distance to object' function. used for alpha too, you can use different textures for the different places. this means, use sand for the ground and some cutted, eroted textures for the top of the mountains. simply add a null object to your scene and control the alpha value. those examples are for lightwave but i'm sure there are similar options for other 3d apps too. | 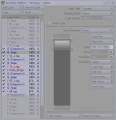 |
| the next steps are comparable. add the
rock textures to the sloped areas of the hills. use small scales for short
range view and a huge scale for far views. don't make the gradient too
hard, if you plan to animate something it could be possible that you get
hard changes if you walk towards the mountains. if you like the results
step forward to the last texture phase. now we need the intersection
between the flat and the sloped areas. for mountains, we have a lot of
stones, rough materials and sand in such places. the technique is the
same, use a slope gradient to blend between the areas. the texture should
be a mixture between the ground and the slant and should fit well into
both textures (colors, size of stones, shadows, brightness). play a little
bit with the values for opacity and the gradient for the slope until
you're happy. fortunately, viper works well (for the case you use
lightwave) so you can check nearly realtime if the placement is all right.
if you want to check if distance to camera works well, you have to
rerender the scene because if you change the position of the camera you
need to update viper. if you check the pictures to the right you can see
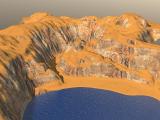
the other 2 parts of the texture layers. the texturing is nearly done now. final steps are adjusting the diffuse shading of the landscape. we'll use some procedual textures for this. we have to remove the clean and perfect look with changing the brightness. some kind of fractal noise or similar texture will do the trick. if you want, you can add such texture layers as 10-20 % alpha channels to the three parts of the textures too. this will add minor changes to the opacity of those layers. depending on the time you have, you can add different textures to parts like a beach (less big stones, more sand) or zones with heavy erosion. (just examples, check your references and you will find a lot of such areas) to be continued - rendering and lighting tips following soon. |
      |
| the rock and the sand textures are taken from realtexture 'materials vol.1'. the combilation includes several nature grounds, urban textures and other objects, inlcuding bump, materials and clip/transparency maps for an affordable price. |  |
| part2a: rendering the landscape | |