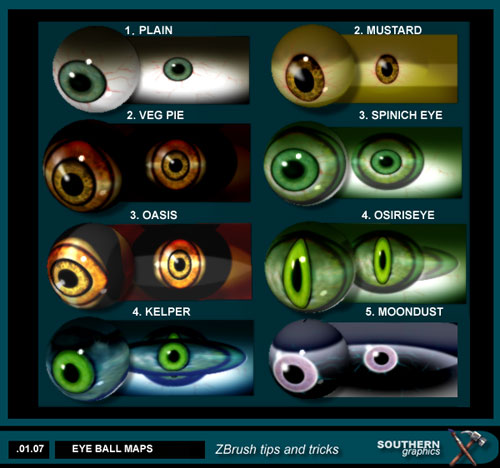
|
|

HOW TO EYEBALL IN
ZBRUSH |
As with most graphic packages there are
always different ways to achieve an effect. This tutorial attempts to show
you some of the best ways to make realistic eyeballs
METHOD 1 `PLANE3D AS A TEXTURE`
1.
Create a PLANE 3D TOOL from the TOOL panel
2. Turn off `Z`
in the DRAW panel
3. Paint your eye onto the plane as you
would with a normal 2D package
4. Use TOOL/MRBGZ GRABBER to
grab the `eye`.
5. Check in the TEXTURES panel and you will
have a TEXTURE MAP of your eye. Choose TOYPLASTIC as a
MATERIAL and create an eye ball with the 3D Sphere. I also find
that I sometimes need to go to Photoshop to help the eyes a bit.
METHOD 2 `THE SYMMETRY
METHOD`
1. Create a 3DSphere with the Toy Plastic material and
enter edit mode.
2. Go to Tools>Modifiers>Initialize
and set the VDivide and HDivide to 256.
3. Go to
Tools>Modifiers>Texture and click on Colorize
4. Go
to Tools>Modifiers>Symmetry and click on Z, R, and increase
the radial count to about 50 (You should adjust this as needed).
5. Make sure that you have only RGB selected in the Draw modes
(Turn off ZADD).
6. Adjust your draw size to about 20, pick a
color for the iris, start in the center of the sphere and draw outwards,
until you have a good size.
7. Adjust your draw size to something
smaller. Choose black and paint the pupil. Continue this technique with
other colors and variations until you’re somewhat happy.
To
enhance this texture....
1. Go to
Tools>Modifiers>Texture and click on COL>TXF. This
transfers what you have painted to the texture menu.
2. Go to
Textures>Inventory>Export and save it as a PSD. I think you
will see what you can do once you got it into Photoshop. I like to select
the colored area, add noise and a motion blur and maybe a few other
filters. Just play.
3. Save it.
4. Back to ZBrush. Go to
Textures>Inventory>Import and select your new texture.

|