MEET THE MODEL
Some decisions
need to be taken at modelling time. You need to detail the model as
much as possible in EDIT mode before moving onto texturing. If you
look at the lips on the head below (1.1)
|
|
|
you can see that
they are plain and relatively featureless. This is fine for the lips
as detail can be added using alpha brushes and adding specularity to
a cloned material. The eye sockets and under-eye area need more work
at modelling stage to ensure the level of detail is adequate to
achieve the desired result.
MATERIAL
NOTES
|
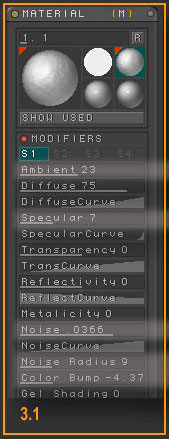 |
Before beginning a big Zbrush project usually have an idea of
the type of materials that I am going to use. For skin/flesh/scales
I usually use one simple material but then make several copies of it
that I change just a little e.g. add more specularity. If materials
have the same basic properties with only minor changes, it prevents
the sharp lines from appearing where two dissimilar materials
meet.
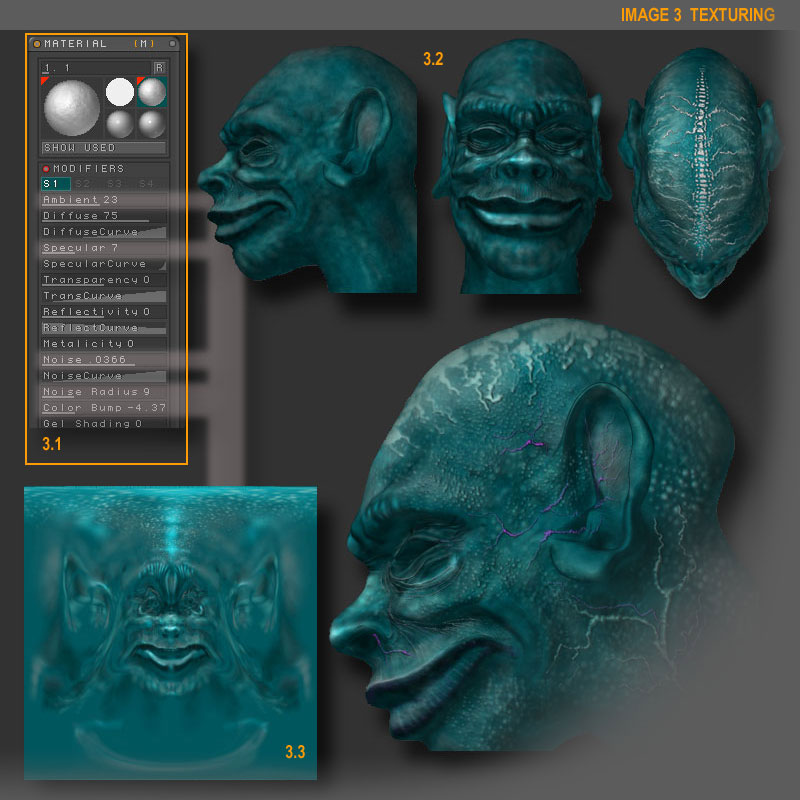
For the skin on this model I wanted to use a basic
material that used colour bump to add detail where ever I used a
lighter colour. The settings I used can be seen in IMAGE 3 (3.1).
This was the base material and from this I made 3 more copies, One
with more specularity (2.3), one with more colour bump (2.1) and one
with less noise radius and a positive colour bump
(2.4)
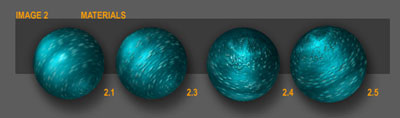
IMAGE 2.
|
TEXTUREMASTERING
|
|
When you are
happy with the model you can launch Texturemaster. I find it easier
to flood fill the model with a dark colour first then add lighter
features as I go (1.2). This ensures that the deep recesses (ears,
eyes, nostrils, lip creases etc.) are completely covered with the
base colour. Have you tried colouring the inside of a nostril with
Texturemaster yet? If you don't have the right undercoat you have to
rotate your model 5 or 6 times to get it covered from every
angle.
|
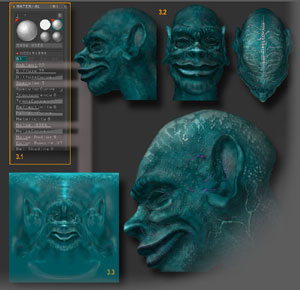 IMAGE 3. Click for large version
NOTE: These TM tips are my
own findings. I strongly urge you to work through the show-me
tutorials built into TM over and over again until you are happy that
you know all that it is capable of.
|
|
|
|
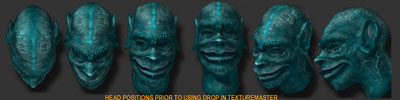
I use the same sort of sequence for texturing a head time and
time again. I usually start by `dropping` (TM DROP or Keyboard G)
the head face on then add some details with a similar colour to the
base colour but a lighter shade. I usually use a `dotty` alpha brush
or make a custom one to give a skin like effect. I then `pick` it up
(TM PICK or Keyboard G again) and roll it back 45 degrees and repeat
the above but use a dark tone of the same colour for under the lips
and eyebrows. Pick again and roll it forward and use a lighter tone
for the top of the nose, eyebrows and lips.
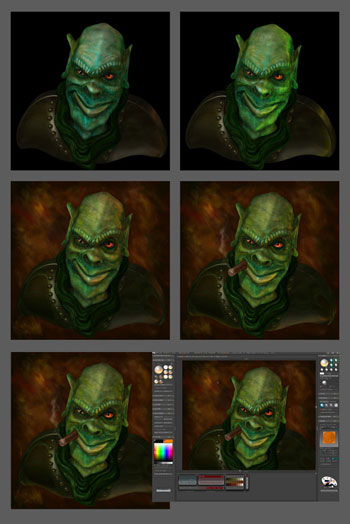
You can
see the texture map you have created at this stage by looking in
your TEXTURE panel. A texture map is being created all the
time you are using Texturemaster. Image 4 shows how this image map
progressed as I worked. (See 4.1,4.3) |
| IMAGE
4 |
|
When I
have done the front I turn the head side on. I use
PREFERENCES>DOTS at this stage to make sure the head is
aligned symmetrically and then turn on the B+F button (Back and
front pickup) which allows me to effectively paint both sides of the
head at the same time. I don't use this button when texturing the
front as we don't want to be two-faced about things do we, although
eyes in the back of the head would be nice.
TIP:Change the
alpha brush and colour frequently. This helps build up layers of
colour and texture. Use a variety of brushes from the palette and
get into the habit of grabbing your own from the canvas. Make a new
layer just for creating alphas if you need to and delete or hide it
as required.
This
process needs to be repeated over and over until you are happy with
the result. Occasionally I `drop` the model at an odd angle to pick
up on a bit of detail but more often than not I stick to the back,
front, up down alignment.
If the
material you are using has similar settings to the ones listed here
(IMAGE 3.1), wherever you have added
lighter tones you will see raised or bumped areas. This is a classic
way of creating scaly skin or blemishes. As Texturemaster is
updating your model every time you do a `pick up` you can adjust
your texture as you go. If you start to add very fine line or
creases with a dark colour you may find that the indentation is too
severe (especially if the dark lines are drawn onto a lighter patch
of skin). To improve this go over the area with the blur brush or
even the smudge brush. The blur brush works much like the blur
feature in a more traditional package and evens out the pixels by
colour and help sooth the harshness. |
|
SNAPSHOTTING INTO
THE DOCUMENT WINDOW
When
you have done enough work on the head-texture move onto setting the
head into an image. Using the Gyro, position and size a copy then
snapshot a copy into a new document window that you have preset to
the size you require (I used 2000x2000 for this project).
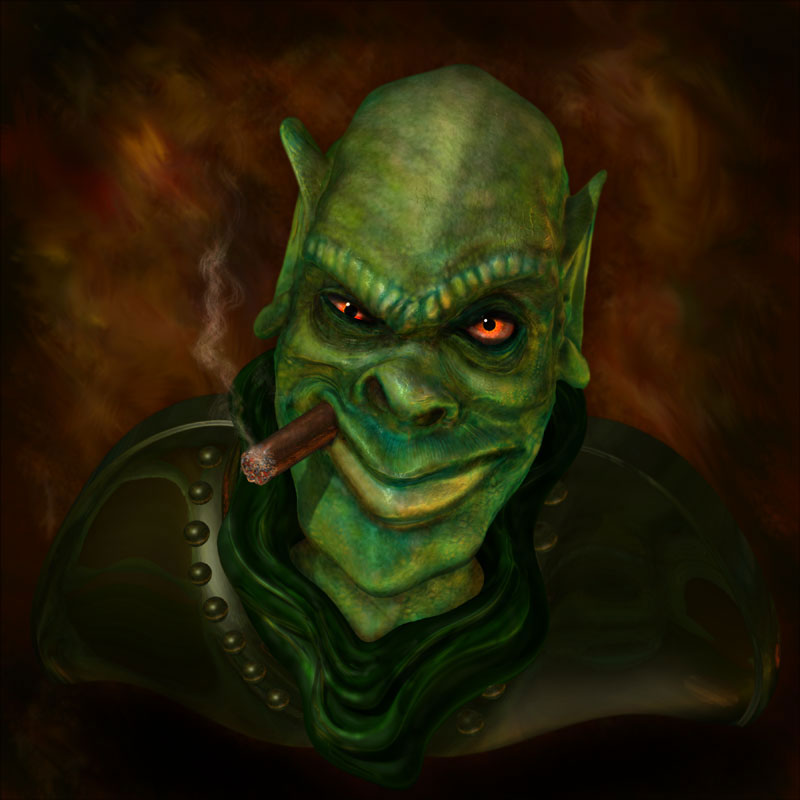
I made
several different versions of the `Smokin Orc` Texture and for the
final image I settled on a more Greenish colour for the creature. I
chose to put the head on some padded shoulders with a creased scarf.
I used four layers as follows:
Layer 1. The Head
Layer 2. The Padded
shoulders
Layer 3. The eyes and the Cigar
Layer 4. The
background and the Scarf.
It is
always a trade off. Keeping the layers to a minimum keeps the speed
of the job high but not enough and it is sometimes hard to go back
and edit individual areas. |
|
|
|
POST WORK ALL IN
ZBRUSH
Although a lot of work goes into the Texturemaster portion of
a project like this there is always a lot of scope to change the
image after setting the scene. Once the head was in place I set to
work with a number of alpha brushes and the materials that I had
created at the start of the project. I added more veins and pimples,
blemishes, boils, creases, wrinkles etc.
I
created the cigar from a tube and textured it after I had snapshot
it in place.
To complete the image I added a red SUN light coming
form the right of the scene and rendered it with shadows on. I then
exported the 2kx2k image as a PSD. I opened a new document set to
the correct dimensions and re-imported the image back in. To
complete the project I used a number of the 3D brushes including
glow, blur, smudge, shading enhancer. I drew the smoke using a
couple of alpha brush and a near transparent white.
|